Wiring a Garage Door Opener: A Step-by-Step Guide
Installing a garage door opener is a common DIY project that can significantly enhance convenience and security. While the installation process can seem daunting, it is achievable for homeowners with basic electrical knowledge and a willingness to follow instructions carefully. This article provides a step-by-step guide to wiring a garage door opener, ensuring a safe and functional installation.
Understanding the Components
Before embarking on the wiring process, it's essential to understand the key components involved in a garage door opener system. These generally include:
- Garage Door Opener Motor Unit: The primary component, containing the motor, control board, and other essential parts.
- Wall Control Button: A switch mounted on the wall that activates the door opener.
- Remote Control: A wireless device that sends signals to the opener, triggering door operation.
- Safety Sensors: Devices placed near the floor that prevent the door from closing on objects or people.
- Power Supply: A dedicated electrical outlet providing power to the opener.
- Wiring Harness: A bundle of wires connecting different components of the system.
Step-by-Step Installation Process
Follow these steps for a safe and successful wiring of your garage door opener:
1. Disconnecting Power
Safety is paramount during any electrical project. Begin by switching off the power to the garage at the circuit breaker box. Verify that the power is off by testing the outlet with a voltage tester.
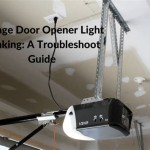
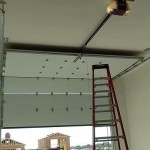
2. Mounting the Motor Unit
Position the motor unit securely to the ceiling or wall according to the manufacturer's instructions. Ensure it is adequately supported and aligned with the door track.
3. Connecting the Motor Unit to the Power Source
Locate the electrical wiring harness and a dedicated outlet. Connect the power cord from the motor unit to the outlet. Verify the wiring connections match the wiring diagram provided in the installation manual.
4. Connecting the Safety Sensors
Install the safety sensors according to the manufacturer's guidelines. These sensors are essential to prevent the door from closing on objects or people. Connect the sensor wires to the designated terminals on the motor unit's control board.
5. Connecting the Wall Control Button
The wall control button provides a wired connection to the motor unit. Connect the wires from the button to the corresponding terminals on the motor unit control board.
6. Connecting the Remote Control
Most garage door openers come with remote controls that operate wirelessly. These remotes use radio frequency signals to communicate with the opener. The receiver for these signals is built into the motor unit control board. Typically, no additional wiring is required for the remote control.
7. Testing and Programming
After securely connecting all wiring, restore power to the garage. Test the opener by pressing the wall control button and observing the door's operation. Program the remote control according to the manufacturer's instructions.
Important Considerations
While installing a garage door opener may seem straightforward, several crucial considerations can ensure a safe and smooth installation:
1. Reading and Following Instructions
Prioritize reading and carefully following the manufacturer's installation manual. Different openers may have specific wiring diagrams and installation procedures.
2. Using the Correct Wiring
Always use the appropriate gauge of wire (thickness) recommended by the manufacturer. Incorrect wiring could lead to overheating, potential fire hazards, or malfunctioning equipment.
3. Checking for Proper Grounding
Ensure the motor unit and all electrical connections are properly grounded. Grounding provides a safe path for electricity to flow in the event of a fault, preventing electrical shock.
4. Hiring a Professional
If you lack the necessary electrical knowledge or feel uncomfortable with any part of the installation process, consider hiring a qualified electrician or garage door specialist. They can ensure a safe and professional installation.
By diligently following these steps, homeowners can successfully wire a garage door opener and enjoy the convenience and security it provides. Remember, prioritizing safety and taking precautions while working with electricity is crucial for a successful project.

Connecting The Garage Door Control Wire

Connecting The Garage Door Control Wire

How To Wire A Garage Door Opener Diy Chamberlain Myq Part 2 Of 3 Youtube

Li Garage Door Opener With Genie Silentmax 1000 Connected But Won T Open Devices Integrations Smartthings Community

Garagemax Bluemate Labs Inc

Zooz Zen16 Wiring Help Needed For Not Myq Garage Door Opener Devices Hubitat

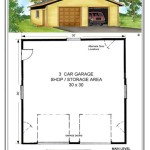
Garage Door Operator Prewire And Framing Guide

Garagemax Bluemate Labs Inc

Garage Door Opener Sensors Not Working Doityourself Com Community Forums

How To Install A Liftmaster 8500 Door Opener High Lift Inc