Setting a Garage Door Opener
A garage door opener is a convenience that most homeowners rely on daily. However, there may be times when the garage door opener needs to be reset or reprogrammed, either due to a change in the remote control, a new garage door opener installation, or simply because the existing settings have been forgotten. Setting a garage door opener is a relatively straightforward process that can be done by most homeowners with just a few simple tools and a little patience.
Understanding the Components
Before you can set your garage door opener, it is helpful to understand the basic components involved:
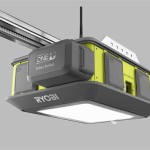
- Garage Door Opener Motor Unit: This is the main component that drives the garage door up and down. It contains the motor itself, the control board, and the receiver that receives signals from the remote control.
- Remote Control: This is the handheld device that sends wireless signals to the garage door opener motor unit.
- Wall Control: This is a switch located inside the garage that can be used to manually open and close the door.
Most modern garage door openers use a rolling code technology for increased security. This means that each time a remote control button is pressed, a unique code is transmitted. This makes it extremely difficult for someone to use a code grabber to intercept and duplicate the signal.
Steps to Setting a Garage Door Opener
The process for setting a garage door opener varies depending on the brand and model. However, the general steps are as follows:
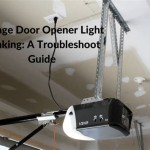
- Locate the Learn Button: The learn button is typically located on the motor unit of the garage door opener. Consult your owner's manual for the exact location.
- Prepare the Remote Control: Consult the owner's manual for any specific programming steps required for your remote. This may involve pressing a specific button on the remote, or holding it close to the motor unit.
- Press the Learn Button: Press and hold the learn button on the motor unit. Keep it pressed until the motor unit's indicator light begins to flash. It may take a few seconds for the light to begin flashing.
- Program the First Remote Control: Immediately press and hold the button on the remote control that you want to program. Release the button once the motor unit's indicator light stops flashing. The remote is now programmed. Repeat this process for each additional remote control you want to program.
- Test the Connection: Once all the remote controls are programmed, test each one by pressing the button to open and close the garage door.
Troubleshooting Common Issues
If you are having trouble setting your garage door opener, there are a few things to check:
- Check the Batteries: Ensure that the batteries in your remote control are fresh and properly installed.
- Verify the Signal Strength: Make sure that there is a clear line of sight between the remote control and the motor unit. Obstacles like walls, windows, or metal objects can interfere with the signal.
If you are still having trouble, consult your garage door opener owner's manual or contact the manufacturer for assistance.

How To Place A Garage Door Opener Into Program Mode For Myq Setup

Troubleshoot Programming A Garage Door Opener To Your Car

How To Reset A Craftsman Garage Door Opener Video

Set Garage Door Travel Max Up And Down Liftmaster Myq Youtube

How To Program The Travel On A Chamberlain Garage Door Opener With Yellow Learn Button

The Down Force And Travel Limits Of Garage Door Openers

How To Set Travel Limits On A Genie Garage Door Opener

Chamberlain Liftmaster Travel Limit And Force Adjustment

Programming Travel Force Limit Overhead Legacy Phantom

How To Adjust A Garage Door Close Completely
See Also