Setting Up Your Liftmaster Garage Door Opener: A Comprehensive Guide
Liftmaster garage door openers are a ubiquitous feature in modern homes, offering convenience and security. A proper setup is crucial for optimal performance and longevity. This article provides a detailed guide on how to set up a Liftmaster garage door opener, covering installation, programming, and troubleshooting.
Understanding the Components and Safety Precautions
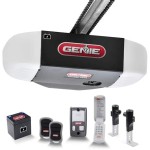
Before beginning the installation process, familiarize yourself with all the components included with your Liftmaster garage door opener. This typically includes the opener unit itself, the rail assembly, the trolley, the safety sensors, the wall control panel, remote controls, and all necessary hardware such as brackets, bolts, and screws. Consult the included instruction manual for a complete parts list and diagrams. The manual is specific to your model and provides important information.
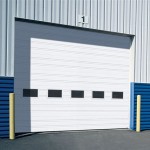
Safety is paramount when working with electrical and mechanical equipment. Prior to any installation or maintenance, disconnect the power supply to the garage door opener at the circuit breaker. This prevents accidental electrical shock. Wear appropriate safety gear, including safety glasses and work gloves. Ensure the garage door is properly balanced before attaching the opener; a poorly balanced door poses a serious safety risk. If the door is difficult to lift or stays open only partially, it requires professional adjustment before proceeding. Always follow the manufacturer's instructions meticulously and never deviate from the recommended procedures.
Furthermore, be aware of the pinch points and moving parts of the garage door mechanism. Keep hands and clothing clear of these areas during operation. If you are uncomfortable performing any of the installation steps, it is advisable to hire a qualified professional to complete the setup. They possess the expertise and experience to ensure a safe and functional installation.
Installation Process: A Step-by-Step Guide
The installation of a Liftmaster garage door opener can be broken down into several key steps, beginning with preparing the garage space. Ensure the area above the garage door is clear of any obstructions, such as pipes or wiring. Reinforce the mounting area on the ceiling with additional lumber if necessary. This provides a secure attachment point for the opener unit.
Assemble the rail assembly according to the manufacturer's instructions. This typically involves connecting multiple sections of the rail together and attaching the trolley. Once the rail is assembled, carefully lift it into place and attach it to the header bracket above the garage door. The header bracket should be securely fastened to a structural support. The rail should be centered above the garage door.
Next, lift the garage door opener unit and attach it to the rail assembly. Ensure the unit is level and securely fastened. Connect the trolley to the garage door using the provided hardware. The trolley connects the opener to the door, enabling it to open and close. Adjust the door arm to ensure smooth and even movement of the garage door. The arm should be properly aligned to prevent binding or stress on the door.
Install the safety sensors on either side of the garage door, approximately six inches above the floor. These sensors are crucial for preventing the door from closing if an obstruction is detected. Ensure the sensors are properly aligned and facing each other. If the sensors are not aligned, the garage door opener will not function correctly. Connect the sensor wires to the opener unit according to the wiring diagram in the instruction manual.
Install the wall control panel in a convenient location near the access door to the garage. Connect the wall control panel wires to the opener unit. The wall control panel allows you to open and close the garage door from inside the garage. Once all wiring is complete, carefully double-check all connections to ensure they are secure and properly connected. Connect the garage door opener to a grounded electrical outlet. Restore power to the circuit breaker.
Programming and Testing the Liftmaster Garage Door Opener
After the physical installation is complete, the garage door opener needs to be programmed. This process involves setting the travel limits, force settings, and programming the remote controls. The travel limits determine how far the garage door opens and closes. The force settings determine the amount of force the opener applies to move the door.
To set the travel limits, locate the adjustment buttons on the opener unit. Consult the instruction manual for the specific location of these buttons on your model. Use the buttons to adjust the up and down travel limits until the garage door opens and closes completely without binding or hitting the floor. It is crucial to set the travel limits accurately to prevent damage to the door or opener.
Next, set the force settings. The force settings should be adjusted to the minimum required to open and close the door. This helps prevent damage if the door encounters an obstruction. If the force is set too high, the door could push through an obstruction instead of stopping. Consult the instruction manual for specific instructions on adjusting the force settings.
To program the remote controls, locate the “learn” button on the opener unit. Press the learn button and then press the button on the remote control that you want to program. The opener unit will typically indicate when the remote control has been successfully programmed. Test the remote control to ensure it is working correctly. Repeat this process for each remote control you want to program.
After completing the programming, thoroughly test the garage door opener. Use the wall control panel and the remote controls to open and close the door multiple times. Observe the movement of the door to ensure it is smooth and even. Verify that the safety sensors are functioning correctly by placing an object in the path of the door while it is closing. The door should stop and reverse direction when it detects the obstruction.
Perform a balance test on the garage door. Disconnect the opener from the door by pulling the emergency release cord. Manually lift the door halfway and release it. The door should remain in that position without drifting up or down. If the door is not properly balanced, contact a qualified garage door technician to adjust the springs.
Troubleshooting Common Issues
Even with careful installation and programming, issues can arise with a Liftmaster garage door opener. Some common problems include the garage door not opening or closing, the remote control not working, the safety sensors not functioning, and the opener making unusual noises.
If the garage door does not open or close, check the power supply to the opener. Ensure the opener is plugged in and the circuit breaker has not tripped. Verify that the safety sensors are properly aligned and not obstructed. If the sensors are misaligned, the opener will not function. If the issue persists, check the travel limits and force settings. Incorrect settings can prevent the door from opening or closing.
If the remote control is not working, check the battery. Replace the battery if necessary. Ensure the remote control has been properly programmed to the opener. If the remote control still does not work, try reprogramming it. If multiple remote controls are not working, there may be an issue with the opener unit itself.
If the safety sensors are not functioning, clean the lenses of the sensors. Dust and debris can interfere with the sensors' ability to detect obstructions. Ensure the sensors are properly aligned and facing each other. Check the wiring connections to the sensors. Loose or damaged wiring can prevent the sensors from functioning correctly.
If the opener is making unusual noises, inspect the rail assembly for any obstructions or damage. Lubricate the rail and trolley with garage door lubricant. Check the gears inside the opener unit for wear or damage. If the gears are worn or damaged, they may need to be replaced. Contact a qualified garage door technician if you are unable to resolve the issue yourself.
Another common issue is the garage door reversing unexpectedly. This is often caused by an obstruction in the path of the door or an incorrectly set force setting. Check for any obstructions and adjust the force setting accordingly. Also, verify that the safety sensors are functioning properly. If the door continues to reverse unexpectedly, there may be a more serious issue with the opener that requires professional attention.

How To Program A Liftmaster Garage Door Opener Remote

How To Reset A Liftmaster Garage Door Opener Quickly

How To Program Liftmaster S 891lm And 893lm Remote Controls A Garage Door Opener

How To Install A Liftmaster 8500 Door Opener High Lift Inc

How To Program A Garage Door Remote Change Battery Liftmaster Chamberlain Youtube

How To Program Liftmaster Garage Door Opener All Security Equipment

Everything You Need To Know About Liftmaster Garage Door Openers Edl Gm

How To Program Liftmaster Remote Controls Doorvana Garage Doors

Install Liftmaster 8500 Jackshaft Garage Door Opener

How To Set Up A Liftmaster Chamberlain Wi Fi Garage Door Opener Surety Support Forum