No Power To Garage Door Sensors: Troubleshooting and Solutions
Garage door sensors are critical safety components that prevent the door from closing if an obstruction is detected in its path. These sensors, typically located near the floor on either side of the garage door opening, project an invisible beam of light. If this beam is interrupted while the door is closing, the sensors signal the garage door opener to reverse direction, thus preventing potential injuries or damage. When the sensors fail to function due to a lack of power, the garage door may not operate correctly, leading to safety concerns and operational inconveniences. Understanding the potential causes and knowing how to troubleshoot the problem are essential for maintaining a functional and safe garage door system.
The symptoms of a garage door sensor without power can vary. The most common indication is the garage door refusing to close, often accompanied by blinking lights on the garage door opener unit itself. The sensors themselves may also exhibit a lack of illumination, indicating they are not receiving power. In some cases, the garage door might close partially and then reverse, indicating a partial or intermittent power issue. It is crucial to address these problems promptly to ensure the garage door system operates safely and reliably.
Identifying the Power Source and Wiring Issues
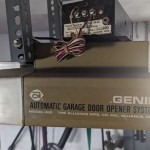
The initial step in troubleshooting a garage door sensor power problem is to identify the power source for the sensors. Most garage door sensors receive power from the garage door opener unit itself. The opener typically has terminals specifically designated for connecting the sensor wires. These terminals usually provide a low-voltage DC power, typically around 24 volts. The wiring connecting the sensors to the opener is often thin, low-voltage wiring that runs along the walls of the garage.
A visual inspection of the wiring is crucial. Look for any signs of damage, such as cuts, fraying, or exposed wires. Rodents often chew on wires, causing damage that can interrupt the power supply. Check the connections at both the sensor terminals and the garage door opener terminals. Ensure the wires are securely connected and that there are no loose connections or corrosion. Corrosion can build up over time, especially in humid environments, and impede the flow of electricity.
If any damage to the wiring is detected, it must be repaired or replaced. Small cuts or breaks can sometimes be repaired by carefully stripping the wires and using wire connectors to join them. However, if the damage is extensive, it is best to replace the entire wire run. When replacing wiring, use the same gauge and type of wire as the original to ensure proper electrical compatibility. It is also important to disconnect the power to the garage door opener before working on any wiring to prevent electrical shock.
Examining the Garage Door Opener Unit
If the wiring appears to be in good condition, the next step is to examine the garage door opener unit itself. The power supply for the sensors originates from the opener, so any issues with the opener's power supply can affect the sensors. Check the circuit breaker that controls the garage door opener. A tripped breaker can cut off power to the entire unit, including the sensors. Reset the breaker to see if this resolves the issue.
Inspect the terminals on the garage door opener where the sensor wires are connected. Ensure that the wires are properly connected and that the connections are clean and free of corrosion. Use a multimeter to test the voltage at these terminals. The multimeter should be set to measure DC voltage, and the probes should be placed on the terminals. If the multimeter reads zero volts or a significantly lower voltage than expected (typically around 24 volts DC), then the opener's power supply for the sensors may be faulty.
If the opener's power supply is suspected to be the problem, further diagnosis may be required. Some garage door openers have internal fuses that protect the power supply. Check the owner's manual for the location of these fuses and inspect them for any signs of damage or breakage. If a fuse is blown, replace it with a fuse of the same amperage rating. If the fuse blows again immediately after being replaced, it indicates a more serious underlying problem with the power supply, possibly requiring repair or replacement of the garage door opener unit.
Addressing Sensor Alignment and Obstructions
Even if the sensors are receiving power, they may not function correctly if they are misaligned or obstructed. The sensors operate by projecting an invisible beam of light from one sensor to the other. If the beam is not properly aligned, or if something is blocking the beam, the sensors will not function as intended. Check the alignment of the sensors. Most sensors have small indicator lights that illuminate when the beam is properly aligned. If the lights are not illuminated, the sensors are misaligned.
To align the sensors, gently adjust them until the indicator lights come on. The sensors are usually mounted on brackets that allow for slight adjustments. Ensure that both sensors are facing each other and that the beam is not being blocked by anything. Common obstructions include leaves, dirt, cobwebs, or even small objects that have been placed near the sensors. Clean the lenses of the sensors with a soft cloth to remove any dirt or debris that may be interfering with the beam.
After aligning the sensors, test the garage door to ensure that it operates correctly. Try closing the door and then interrupting the beam by placing an object in its path. The door should immediately reverse direction. If the door still does not reverse, double-check the alignment and ensure that there are no obstructions. If the sensors are properly aligned and there are no obstructions, but the door still does not reverse, the sensors themselves may be faulty and require replacement. When replacing sensors, it is generally advisable to replace both sensors at the same time to ensure consistent performance and compatibility.
Another factor that can affect sensor performance is sunlight. Direct sunlight shining into the sensors can sometimes interfere with the beam and cause the sensors to malfunction. If the garage door is facing east or west, the sensors may be more susceptible to sunlight interference. If this is the case, consider installing sun shields or repositioning the sensors to minimize the impact of direct sunlight.
In cases where the sensors are frequently misaligned due to vibrations or other external factors, consider using more robust mounting brackets or adding additional support to the existing brackets. This can help to ensure that the sensors remain properly aligned and that the garage door operates reliably.
Regular maintenance of the garage door sensors can help to prevent many common problems. Clean the lenses of the sensors regularly, check the wiring for any signs of damage, and ensure that the sensors are properly aligned. By performing these simple maintenance tasks, homeowners can ensure that their garage door sensors are functioning correctly and that their garage door system is operating safely and reliably.

Why Is There No Power To My Garage Door Sensors

How To Fix Garage Door Sensors That Are Not Working

Why Is There No Power To My Garage Door Sensors

Fix Your Garage Door Sensors In These 4 Easy Steps 2025 Today S Homeowner

Why Is There No Power To My Garage Door Sensors In Arlington Tx

3 Ways To Disable A Garage Door Sensor Wikihow

Garage Door Sensor Blinking Red Here S What To Check Rcs

3 Ways To Disable A Garage Door Sensor Wikihow

How To Troubleshoot A Garage Door The Home

Garage Door Safety Sensors Troubleshooting Complete 3 Step Guide
See Also