LiftMaster Garage Door Opener Troubleshooting Manual
A malfunctioning garage door can be a significant inconvenience. This guide provides a comprehensive overview of troubleshooting common issues with LiftMaster garage door openers, empowering homeowners to diagnose and potentially resolve problems before contacting a professional. This information should not replace professional assistance when needed but serve as a preliminary resource.
Initial Checks: Before delving into specific issues, certain preliminary checks can often pinpoint the source of the problem. Verify that the garage door opener is plugged into a functioning power outlet. Examine the circuit breaker associated with the opener to ensure it hasn't tripped. Test the garage door's balance by manually disengaging the opener and lifting the door. A properly balanced door should stay in position without assistance. Obstructions in the door's path should also be cleared.
Remote Control Problems: If the garage door doesn't respond to the remote control, the first step is to check the batteries. Replace them if necessary. Verify the antenna on the motor unit is pointing downwards and unobstructed. Reprogramming the remote might be required if battery replacement doesn't resolve the issue. Consult the LiftMaster owner's manual for specific programming instructions for your model.
Wall Control Issues: Problems with the wall control can mirror those of the remote. Ensure the wires connecting the wall control to the motor unit are secure. If the button is unresponsive, it might need replacing. Like remote controls, wall controls can also lose their programming and require re-synchronization with the motor unit.
Keypad Issues: If the keypad fails to operate the door, ensure the batteries are functional. Clean the keypad contacts to remove any debris or corrosion. Try re-entering the PIN code, as it might have been accidentally altered. Like remotes and wall controls, keypads can also require reprogramming.
Safety Sensors: The safety sensors are a critical safety feature. If the door reverses direction immediately after closing or refuses to close entirely, the sensors are likely the culprit. Check for obstructions blocking the sensor's path. Clean the lenses of both sensors with a soft cloth. Verify the wiring connecting the sensors to the motor unit is intact and secure. Ensure the sensors are properly aligned; a small LED light on each sensor usually indicates proper alignment.
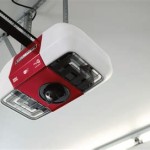
Motor Unit Issues: A humming sound from the motor unit without any door movement usually indicates a stripped gear or a problem with the motor itself. This situation requires professional repair. Attempting to force the motor to operate can exacerbate the damage. Similarly, a grinding noise suggests a more serious mechanical problem requiring professional attention.
Limit Switch Adjustment: The limit switches control the travel distance of the garage door. If the door doesn't open or close completely, the limit switches might need adjustment. Consult your LiftMaster owner's manual for the specific adjustment procedure for your model, as improper adjustment can damage the door or opener.
Troubleshooting the Logic Board: Problems originating from the logic board are complex and require professional diagnostics. Signs of logic board issues include erratic behavior, such as the door opening and closing randomly, or the opener's lights flashing in an unusual pattern. Attempting to repair the logic board without proper training and equipment is not recommended.
Manual Release: In case of a power outage or opener malfunction, the manual release cord allows disengaging the opener from the door. Locate the red cord hanging from the trolley and pull it to disconnect the opener. This will allow you to manually open and close the door.
Regular Maintenance: Preventative maintenance can significantly reduce the likelihood of garage door opener issues. Lubricating the moving parts of the door and opener, including the chain, sprockets, and rollers, at least annually is recommended. Inspecting the door and opener components regularly for signs of wear and tear can also help prevent future problems.
Professional Assistance: While this guide provides a starting point for troubleshooting, contacting a qualified LiftMaster technician is recommended if the problem persists or if you are uncomfortable performing any of these procedures. Professional technicians possess the expertise and equipment to diagnose and resolve complex issues safely and effectively.
Warranty Information: Review your LiftMaster warranty information for coverage details on repairs or replacement parts. Attempting to repair covered components yourself might void the warranty. Always refer to the official LiftMaster documentation or contact their customer support for warranty-related inquiries.
Safety Precautions: Exercise caution when working with garage door components. Always disconnect the power supply before performing any maintenance or repairs. Never attempt to repair or adjust components while the door is in motion. If unsure about any procedure, seek professional assistance.

Troubleshooting Your Liftmaster 8500 Door Opener High Lift Inc

How To Troubleshoot A Liftmaster Garage Door Opener

Liftmaster Manual Garage Door Opener Instruction

Liftmaster 881lmw Garage Door Openers User Guide

Liftmaster Manuals And Instructions Home Garage Guide

How To Troubleshoot My Liftmaster Garage Door Opener

How To Reset Garage Door Opener Liftmaster Updated 2024

How To Troubleshoot A Liftmaster Garage Door Opener

Liftmaster 881lmw Garage Door Openers User Guide

Troubleshooting Liftmaster Operator Error Codes Ddm Garage Doors Blog Dan S Door
See Also