Liftmaster Garage Door Opener: How to Program
Programming a Liftmaster garage door opener is a straightforward process that can be completed in a few simple steps. Follow these instructions to easily program your Liftmaster garage door opener and enjoy the convenience of automated access to your garage.
Gather Necessary Tools and Materials
Before you begin programming, ensure you have the following items:
- Liftmaster garage door opener - Ladder (if necessary) - User manual (if available)Locate the Programming Button and LED
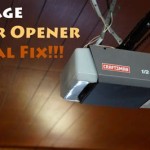
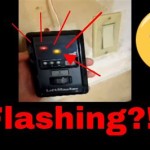
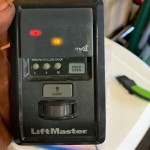
On the back of the garage door opener, locate the "Program" button and the corresponding LED indicator. The "Program" button is typically a small, rectangular button with a label. The LED indicator is often a small light that flashes or illuminates during programming.
Clear Existing Codes
If the garage door opener has been previously programmed, you will need to clear any existing codes. To do this, press and hold the "Program" button for 6 seconds. The LED indicator will flash rapidly, indicating that the codes have been cleared.
Enter Programming Mode
To enter programming mode, press and release the "Program" button. The LED indicator will begin to flash slowly, indicating that the opener is ready to receive new codes.
Program Remote Controls
To program a remote control, hold the remote close to the LED indicator on the back of the garage door opener. Press and hold the "Remote" button on the remote control. The LED indicator will flash rapidly for a few seconds, then turn off. This indicates that the remote has been successfully programmed.
Program Keypad
To program a keypad, enter the desired 4-digit PIN code on the keypad. Press the "Enter" button. The LED indicator will flash rapidly for a few seconds, then turn off. This indicates that the keypad has been successfully programmed.
Program Wall Console
To program a wall console, press and hold the "Program" button on the wall console. The LED indicator will begin to flash slowly. Enter the desired 4-digit PIN code on the wall console. Press the "Enter" button. The LED indicator will flash rapidly for a few seconds, then turn off. This indicates that the wall console has been successfully programmed.
Check Programming
After programming all desired devices, test the operation of the garage door opener by pressing the button on the remote control, entering the PIN code on the keypad, or using the wall console. The garage door should open and close smoothly.
Additional Tips
- If the LED indicator does not respond when you press the "Program" button, check the batteries in the remote control or replace the batteries in the garage door opener.
- If you have difficulty programming the garage door opener, refer to the user manual for specific instructions relevant to your model.
- For additional assistance, contact Liftmaster customer support or a qualified electrician.

How To Program Travel On Liftmaster Security 2 0 Garage Door Opener

Program A Liftmaster Remote 890max 893max 895max Broten

How To Program A Liftmaster Garage Door Opener Remote

How To Program A Garage Door Remote Change Battery Liftmaster Chamberlain

How To Program Liftmaster Remote Controls Doorvana Garage Doors

How To Erase And Program Liftmaster Garage Door Remote 604 757 6557

How To Program Your Liftmaster And Genie Garage Door Opener Remote Creative Services

How To Program A Liftmaster Garage Door Opener Remote

How To Program Liftmaster S 891lm And 893lm Remote Controls A Garage Door Opener

Programming Liftmaster 877max Wireless Keypad
See Also