Lifestyle Garage Screen Door Installation: A Comprehensive Guide
Garage screen doors have become increasingly popular among homeowners seeking to enhance their living spaces. They offer a simple yet effective way to transform a garage into a versatile area for relaxation, entertainment, or pursuing hobbies, all while maintaining protection from insects and enjoying natural ventilation. Among the various options available, the Lifestyle garage screen door system stands out for its innovative design, ease of use, and durability. This article provides a detailed guide to installing a Lifestyle garage screen door, covering essential steps, considerations, and best practices.
Before embarking on the installation process, it is crucial to assess the existing garage door opening and ensure compatibility with the Lifestyle system. Measure the width and height of the opening accurately, paying attention to any obstructions or irregularities that might hinder the installation. Check the headroom clearance above the opening, as this will determine the available space for the screen door to retract. Confirm that the garage door tracks are in good working condition and properly aligned, as they will serve as the foundation for the screen door frame.
Gather all the necessary tools and materials before starting the installation. These typically include a measuring tape, level, drill with various drill bits, screwdriver (both Phillips and flathead), socket wrench set, safety glasses, ladder, and the complete Lifestyle garage screen door kit. Ensure that the kit contains all the required components, such as the screen door frame sections, screen mesh, hinges, latches, mounting hardware, and installation instructions. A second person to assist during the installation process is highly recommended, especially when handling larger frame sections.
Preparing the Garage Door Opening
Proper preparation of the garage door opening is crucial for a successful and long-lasting installation. Begin by cleaning the area thoroughly, removing any dirt, debris, or old weather stripping that might interfere with the frame alignment. Inspect the existing garage door tracks for any damage, such as bends or rust. If necessary, repair or replace the tracks before proceeding. Ensure that the tracks are securely fastened to the garage door frame and are aligned vertically. A plumb line can be used to verify the track alignment accurately.
If the garage door opening is not perfectly square, it is important to address the issue before installing the screen door. Use shims to level any uneven surfaces and create a flush mounting surface for the frame. Any gaps between the frame and the opening should be sealed with weather stripping to prevent drafts and insect intrusion. Pay close attention to the corners of the opening, as these are often the most vulnerable to air leaks. Proper preparation ensures a tight seal and optimal performance of the screen door.
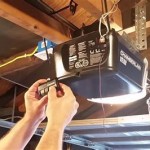
The Lifestyle garage screen door utilizes the existing garage door tracks for its operation. The installation process involves attaching the screen door frame to these tracks, allowing the screen door to slide up and down smoothly. Before attaching the frame, ensure that the tracks are free of any obstructions, such as loose screws or debris. Lubricate the tracks with a silicone-based lubricant to reduce friction and ensure smooth operation. This step is particularly important if the garage door tracks are old or have not been maintained properly.
Assembling the Screen Door Frame
The assembly of the Lifestyle garage screen door frame typically involves connecting several frame sections using screws or bolts. Follow the manufacturer's instructions carefully, ensuring that each section is properly aligned and securely fastened. Use a level to verify that the frame is square and plumb. A square frame is essential for the smooth operation of the screen door.
The screen mesh is usually attached to the frame using a spline and groove system. Insert the spline into the groove around the perimeter of the frame, securing the screen mesh in place. Ensure that the screen is taut and free of wrinkles or sags. Use a specialized spline roller tool to evenly distribute the pressure and ensure a tight fit. Trim any excess screen material around the edges of the frame.
Once the frame is assembled and the screen mesh is installed, attach the hinges and latches according to the manufacturer's instructions. The hinges allow the screen door to swing open and closed, while the latches secure the door in the closed position. Ensure that the hinges are properly aligned and securely fastened to the frame. Test the latches to ensure that they engage properly and hold the door securely. Adjust the hinges and latches as needed to ensure smooth operation.
Installing the Screen Door System
With the screen door frame fully assembled, the next step is to install the system within the existing garage door opening. This typically involves attaching the frame to the garage door tracks using mounting brackets. Position the frame within the opening and align it with the tracks. Use a level to verify that the frame is plumb and square. Secure the mounting brackets to the tracks using screws or bolts. Ensure that the brackets are properly aligned and securely fastened to the tracks.
Once the frame is attached to the tracks, test the operation of the screen door. Slide the door up and down, ensuring that it moves smoothly and without any obstructions. If the door binds or sticks, adjust the mounting brackets or lubricate the tracks. The goal is to achieve smooth and effortless operation of the screen door.
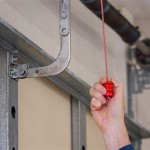
After the installation, it's crucial to adjust the tension of the screen door’s operating mechanism, which is usually a spring-loaded system or a counterbalance mechanism. Refer to the manufacturer’s instructions for the specific adjustment procedure. Proper tension ensures that the screen door remains in the desired position and prevents it from drifting or slamming shut. Adjust the tension until the door operates smoothly and stays in place when opened or closed.
Final Adjustments and Maintenance
After the installation is complete, perform a final inspection to ensure that all components are properly installed and functioning correctly. Check the alignment of the frame, the operation of the hinges and latches, and the tension of the operating mechanism. Make any necessary adjustments to ensure smooth and reliable operation of the screen door.
Regular maintenance is essential to prolong the life of the Lifestyle garage screen door system. Clean the screen mesh regularly with a soft brush or vacuum cleaner to remove dust and debris. Lubricate the tracks and hinges with a silicone-based lubricant to maintain smooth operation. Inspect the mounting hardware for any signs of corrosion or damage. Replace any worn or damaged components promptly.
Periodically inspect the weather stripping around the frame to ensure that it is in good condition and providing a tight seal. Replace any damaged or worn weather stripping to prevent drafts and insect intrusion. Adjust the tension of the operating mechanism as needed to maintain smooth and reliable operation of the screen door.
By following these steps and performing regular maintenance, homeowners can enjoy the benefits of a Lifestyle garage screen door for years to come. The screen door provides a versatile and cost-effective way to transform a garage into a comfortable and functional living space, all while enjoying the benefits of fresh air and natural light.

Garage Door Screens Lifestyle Screens Screen System

Garage Door Screens Lifestyle Screens Screen System

Product Catalog

Garage Door Screens Lifestyle Screens Screen System

Lifestyle Garage Door Screen Screens Joe Wilde Company

Installation Videos 7 8 Lifestyle Screens

Benefits Of Screen Doors For Your Garage Overhead Door Company Grand Strand Myrtle Beach

Garage Door Screens Lifestyle Screens Screen System

Lifestyle Screens The Most Versatile Garage Screen On Planet 16 Ft X 7 Roll Up Door With Sandstone Frame And Charcoal Fiberglass Mesh Lsy1607sss Home

Lifestyle Screens Adds 9 H And 10 Garage Door Screen
See Also