How To Reset a Liftmaster Garage Door Opener
A Liftmaster garage door opener is a complex electromechanical device designed for automated garage access. It employs a sophisticated system of sensors, electronic controls, and a motorized mechanism to raise and lower the garage door smoothly and safely. Over time, various factors can necessitate a reset of the system. This could range from programming difficulties to sensor malfunctions or even simple troubleshooting after a power outage. Understanding the process of resetting a Liftmaster opener is crucial for maintaining its optimal functionality and ensuring reliable performance.
Resetting a Liftmaster garage door opener clears its current programming, returning it to its factory default settings. This can resolve a variety of issues by allowing the user to re-establish the connection between the opener unit and its remote controls, keypads, and other accessories. The process generally involves using the opener's built-in programming features, often accessed through buttons and/or the learn button on the motor unit itself. Proper execution of the reset procedure is essential to avoid damaging the opener or introducing further complications.
Before initiating any reset procedure, it's critical to identify the specific model of the Liftmaster garage door opener. Models can differ significantly in their programming interfaces and reset methods. The model number is typically located on a sticker affixed to the motor unit housing. Consulting the owner's manual for the specific model is highly recommended before proceeding, as the manual provides detailed instructions and safety precautions tailored to that particular opener. Failure to consult the manual could lead to incorrect reset procedures, potentially requiring professional assistance to rectify.
Safety is paramount when working with electrical appliances. Before beginning any reset procedure, ensure that the garage door opener is disconnected from its power source. This prevents accidental activation of the motor during the reset process, which could cause serious injury or damage to the opener or the garage door itself. Locate the power cord plugged into the outlet and carefully unplug it. It is also prudent to ensure the garage door is fully closed before commencing the reset. If the door is partially open, manually lower it to the closed position and engage the safety lock, if available.
Key Point 1: Clearing the Memory on a Liftmaster Garage Door Opener
One of the most common reasons to reset a Liftmaster garage door opener is to clear its memory. This is particularly useful when you have lost a remote control, moved into a new home where you don’t know all previous users of the garage, or suspect unauthorized access to the garage door. Clearing the memory effectively erases all previously programmed remote controls and keypads, ensuring that only the devices you reprogram will be able to operate the door.
The method for clearing the memory typically involves locating the 'Learn' button on the garage door opener motor unit. This button is usually colored (often yellow or orange, but can vary by model) and is typically located on the back or side of the motor unit. Pressing and holding this button for a specific duration (usually around 6 to 10 seconds) initiates the memory clearing process. After releasing the button, a light on the opener will usually blink to indicate that the memory has been successfully cleared. Some models may require a slightly different procedure, so referring to the owner's manual is crucial.
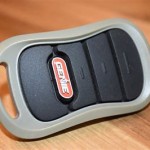
Following the memory clearing procedure, it will be necessary to reprogram all desired remote controls and keypads. This process typically involves pressing the 'Learn' button again, followed by pressing the button on the remote control that you wish to program. The opener will then learn the code from the remote, allowing it to operate the door. Repeat this process for each remote control or keypad that needs to be programmed. Make sure to verify that each remote control and keypad functions correctly after programming. If a remote control fails to program properly, try replacing the battery in the remote control and repeating the steps.
It is important to note that clearing the memory will also erase any programmed settings for smart home integration. If the garage door opener is connected to a smart home system (e.g., MyQ), you will need to reconfigure this connection after performing the memory clearing procedure. This may involve re-linking the opener to your smart home account through the respective app or platform. Consult the documentation for your smart home system for instructions on how to re-establish the connection.
Key Point 2: Resetting the Travel Limits on a Liftmaster Garage Door Opener
The travel limits on a Liftmaster garage door opener define the points at which the door stops when fully open and fully closed. These limits are crucial for ensuring safe operation and preventing damage to the door or opener. If the garage door is not closing completely, is reversing unexpectedly, or is hitting the floor too hard, it may be necessary to reset the travel limits.
Resetting the travel limits typically involves using the adjustment buttons located on the motor unit. These buttons are usually marked with up and down arrows or symbols representing the open and close positions. The specific procedure for adjusting the travel limits varies depending on the model of the opener, but it generally involves pressing and holding the adjustment buttons while the door moves to the desired open and close positions. The owner's manual provides detailed instructions on how to precisely adjust the travel limits for your specific model.
Before adjusting the travel limits, it is important to disconnect the garage door opener from the power source to prevent accidental operation during the adjustment process. Next, manually disengage the garage door from the opener by pulling the emergency release cord. This allows you to move the door freely and manually set the desired open and close positions. Once the door is in the desired position, re-engage the opener and reconnect it to the power source.
After setting the travel limits, it is crucial to test the operation of the garage door to ensure that it opens and closes smoothly and completely. Observe the door carefully as it moves, paying attention to any signs of binding, hesitation, or excessive noise. If the door does not operate correctly, repeat the travel limit adjustment process until the desired performance is achieved. It is also advisable to perform a safety reversal test after adjusting the travel limits. This test involves placing an object (e.g., a piece of wood) in the path of the closing door to ensure that the door reverses automatically upon contact.
Key Point 3: Addressing Sensor Issues and Resetting the Safety System
Liftmaster garage door openers are equipped with safety sensors, typically located near the bottom of the door tracks, that prevent the door from closing if an obstruction is detected. These sensors are a crucial safety feature, and any malfunction can cause the opener to behave erratically. Common issues include misaligned sensors, dirty sensors, or damaged wiring. Resetting the safety system may resolve these issues.
Before attempting to reset the safety system, visually inspect the sensors to ensure that they are properly aligned and that the lenses are clean. The sensors should be facing each other and aligned correctly. Clean the lenses with a soft, dry cloth to remove any dirt or debris that may be blocking the signal. Check the wiring connections to the sensors to ensure that they are secure and that there are no signs of damage. If any wires are loose or damaged, repair or replace them as necessary.
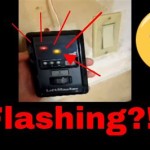
A common indicator of a sensor issue is a blinking light on the opener unit or on the sensors themselves. The specific meaning of the blinking light varies depending on the model of the opener, but it usually indicates that the sensors are not aligned, are obstructed, or are malfunctioning. Consult the owner's manual for specific troubleshooting steps related to the blinking light code.
To reset the safety system, disconnect the garage door opener from the power source for a few minutes. Then, reconnect the power and observe the sensors. If the sensors are properly aligned and functioning correctly, the light on the sensors should be solid. If the light is still blinking, try realigning the sensors manually. You may need to loosen the mounting brackets and adjust the position of the sensors until the light turns solid. Make sure to tighten the mounting brackets after realigning the sensors. After addressing any sensor issues, test the operation of the garage door to ensure that it opens and closes smoothly and that the safety sensors are functioning correctly. If the door still does not operate correctly, further troubleshooting may be required.
If the above steps do not resolve the issues with the Liftmaster garage door opener, consult a qualified garage door technician. Attempting to repair or modify the opener without proper knowledge and experience can be dangerous and may void the warranty. A technician can diagnose the problem accurately and perform the necessary repairs or replacements safely and effectively. Always prioritize safety and consult with a professional when in doubt.

How To Reset Liftmaster Garage Door Opener Soft And Hard

How To Reset A Liftmaster Garage Door Opener Quickly

How To Reset Garage Door Opener Liftmaster Updated 2024

How To Reset A Liftmaster Garage Door Opener Quickly

How To Reset A Liftmaster Garage Door Opener Quickly

How To Erase The Memory Of Your Liftmaster Garage Door Opener Youtube

How To Reset Liftmaster Chamberlain Side Mount Garage Door Opener In Dallas Ft Worth Tx

How To Reset A Liftmaster Garage Door Opener Quickly

How To Reset Garage Door Opener Liftmaster Updated 2024

How To Reset A Liftmaster Chamberlain Garage Door Opener In Panama City Fl
See Also