How to Replace Garage Door Opener Battery
With the convenience of automatic garage door openers, it's essential to ensure they function reliably, and one of the crucial components that keep them running smoothly is the battery. Over time, garage door opener batteries may deplete, affecting the opener's performance. Replacing the battery is a relatively straightforward task that can be completed in a few simple steps.
Identifying the Battery Location
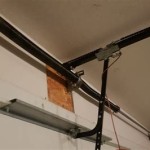
The first step is to locate the battery in your garage door opener. Most openers have a battery compartment either on the motor unit mounted on the ceiling or inside a wall-mounted control panel. Refer to your opener's user manual for specific instructions on the battery compartment's location.
Disconnecting Power to the Opener
Before starting any electrical work, it's essential to disconnect power to the garage door opener. Locate the circuit breaker or fuse box and turn off the power supply to the opener. This safety measure prevents any electrical accidents while working on the battery.
Opening the Battery Compartment
Once the power is disconnected, open the battery compartment by unscrewing or unlatching the cover. Some compartments have a plastic tab or lever that you need to press or pull to release the cover.
Removing the Old Battery
Inside the compartment, you'll find the old battery. It's typically a 9-volt or 12-volt battery, and it may be connected to wires or terminals. Carefully disconnect the wires or remove the battery from its terminals, then lift it out of the compartment.
Inserting the New Battery
Take the new battery and align it correctly with the terminals or wires in the battery compartment. Make sure the positive (+) and negative (-) terminals on the battery match the corresponding markings on the compartment. Securely connect the wires or insert the battery into the terminals.
Closing the Battery Compartment
Once the new battery is in place, close the battery compartment cover and fasten it securely. Ensure the cover is completely shut to prevent the battery from coming loose.
Restoring Power to the Opener
After replacing the battery, return to the circuit breaker or fuse box and turn the power back on to the garage door opener. The opener should now function with the new battery.
Testing the Opener
To ensure the battery replacement was successful, test the garage door opener by operating it using the wall-mounted control panel or remote control. The door should respond promptly and open and close smoothly.
Additional Considerations
It's recommended to replace the garage door opener battery every 1-2 years, even if it's still functioning, to prevent unexpected interruptions. Choose a high-quality battery for optimal performance and longevity. If you experience any difficulties during the battery replacement process, refer to your opener's user manual or contact the manufacturer.

Replace Your Garage Opener Remote Battery Easy Diy

Replace Battery In Garage Door Opener Wireless Transmitters

How To Change The Battery In Your Garage Door Remote Youtube

How To Replace Battery Chamberlain Garage Door Opener Remote Youtube

Battery Change In Your Chamberlain Garage Door Opener Easy Diy Replacement

How To Change The Battery On A Garage Door Opener Remote Liftmaster Youtube

How To Replace Your Garage Opener Remote Battery Youtube

How To Replace Garage Door Opener Remote Battery Change Replacement Liftmaster Clicker Batteries

Liftmaster Garage Door Opener Remote Battery Diy Tips 2024

How To Change The Battery On Garage Door Remote Liftmaster Security Chamberlain Opener