How to Replace Battery in Garage Door Opener
Garage door openers are a convenient way to open and close your garage door without having to get out of your car. They work by using a battery to power a motor that opens and closes the door. If the battery in your garage door opener dies, you will not be able to open or close the door using the remote control. You will need to replace the battery in order to regain use of the opener.
Replacing the battery in a garage door opener is a relatively simple process. However, it is important to follow the instructions carefully to avoid damaging the opener. The following steps will guide you through the process of replacing the battery in your garage door opener:
1. Safety First
Before you begin working on your garage door opener, it is important to take some safety precautions. First, make sure that the garage door is closed and that the power to the opener is turned off. This will prevent the door from opening or closing while you are working on it.
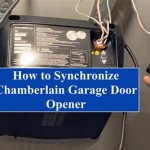
2. Locate the Battery
The battery in your garage door opener is usually located on the back or side of the unit. It may be covered by a plastic cover. Remove the cover to expose the battery.
3. Disconnect the Battery
Once the battery is exposed, you will need to disconnect it from the opener. There are usually two terminals on the battery, one positive and one negative. Disconnect the negative terminal first, followed by the positive terminal.
4. Install the New Battery
Take the new battery and connect it to the opener. Connect the positive terminal first, followed by the negative terminal.
5. Replace the Cover
Once the new battery is connected, replace the plastic cover. Make sure that the cover is securely in place before turning on the power to the opener.
6. Test the Opener
Once the power is turned on, test the opener to make sure that it is working properly. Use the remote control to open and close the door. If the door opens and closes smoothly, then you have successfully replaced the battery.
Replacing the battery in a garage door opener is a simple process that can be completed in a few minutes. By following the steps outlined in this article, you can ensure that your garage door opener is working properly and that you can open and close your garage door with ease.

Replace Your Garage Opener Remote Battery Easy Diy

How To Change The Battery On Garage Door Remote Liftmaster Security Chamberlain Opener Youtube

How To Change The Battery In Your Garage Door Remote Youtube

Replace Battery In Garage Door Opener Wireless Transmitters

How To Replace Battery Chamberlain Garage Door Opener Remote Youtube

Battery Change In Your Chamberlain Garage Door Opener Easy Diy Replacement

How To Change The Battery On A Garage Door Opener Remote Liftmaster Youtube

Replace Cr2032 Coin Cell Battery In Li Garage Door Opener Quick And Easy Youtube

How To Replace Your Garage Opener Remote Battery Youtube

How To Replace Garage Door Opener Remote Battery Change Replacement Liftmaster Clicker Batteries