How To Put Up A Garage Door Opener
Garage door openers are a convenient way to open and close your garage door without having to get out of your car. They can be installed by a professional or do-it-yourselfer with some basic tools and knowledge. Here are the steps on how to put up a garage door opener:
Step 1: Gather your tools and materials.
You will need the following tools and materials to install a garage door opener:
- Garage door opener
- Screwdriver
- Drill
- Drill bit
- Wrench
- Wire strippers
- Electrical tape
- Clamps
- Ladder
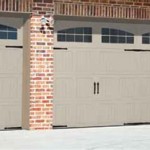
Step 2: Prepare the garage door.
Before you can install the garage door opener, you need to prepare the garage door. This involves making sure that the door is properly balanced and that the tracks are clear of any debris. To balance the door, disconnect the door from the opener and lift it halfway. The door should stay in place without moving up or down. If the door does not stay in place, you will need to adjust the springs. Once the door is balanced, check the tracks for any debris and remove it if necessary.
Step 3: Install the mounting brackets.
The next step is to install the mounting brackets for the garage door opener. The brackets will be attached to the ceiling and the header above the door. To install the brackets, use a drill to make holes in the ceiling and the header. Then, insert the bolts into the holes and tighten the nuts. Make sure that the brackets are level and securely attached.
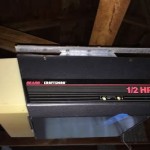
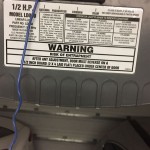
Step 4: Install the motor unit.
Once the mounting brackets are installed, you can install the motor unit. The motor unit is the main part of the garage door opener and it is responsible for lifting and lowering the door. To install the motor unit, lift it into place and secure it to the mounting brackets. Use the bolts and nuts that came with the garage door opener to tighten the motor unit in place.
Step 5: Install the drive system.
The next step is to install the drive system. The drive system is what connects the motor unit to the door. There are two types of drive systems: chain drive and belt drive. Chain drives are less expensive than belt drives, but they are also noisier. Belt drives are more expensive than chain drives, but they are also quieter. To install the drive system, attach the drive gear to the motor unit and the driven gear to the door. Then, connect the drive system to the motor unit and the door.
Step 6: Install the sensors.
The next step is to install the sensors. The sensors are responsible for detecting when the door is open or closed. To install the sensors, mount them on the side of the door and on the header above the door. Make sure that the sensors are aligned with each other and that they are not obstructed by anything.
Step 7: Wire the garage door opener.
The final step is to wire the garage door opener. The wiring is not difficult, but it is important to follow the instructions that came with the garage door opener. To wire the garage door opener, connect the wires from the motor unit to the wires from the sensors and the drive system. Then, connect the wires from the garage door opener to the power supply.
Step 8: Test the garage door opener.
Once the garage door opener is wired, it is important to test it to make sure that it is working properly. To test the garage door opener, press the button on the remote control. The door should open and close smoothly. If the door does not open or close properly, check the wiring and make sure that all of the connections are secure.

How To Install A Garage Door Opener The Home

Re Attach Your Garage Door Opener

How To Install A Garage Door Opener

How To Install A Garage Door Opener

Smart Garage Door Opener Installation The Navage Patch

How To Install A Garage Door Opener The Home

How To Install A Garage Door Opener With S Wikihow

Garage Door Opener Installation Cost Coolyeah Organization Caster Wheels

How To Install A Garage Door Opener With S Wikihow

15 Step Guide To Installing A Garage Door Opener Fix Doors Ca