How to Program a LiftMaster Garage Door Opener
Programming a LiftMaster garage door opener is a straightforward process that can be completed in a few simple steps. Whether you're replacing an existing opener or installing a new one, following these instructions will ensure a seamless setup.
Materials Required:
* LiftMaster garage door opener * Programming remote * Ladder (optional)Step-by-Step Instructions:
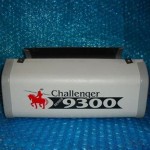
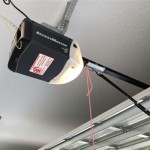
1. Identify the Smart Button: * Locate the Smart Button on the back of the garage door opener motor unit. It typically has a small circular shape and an LED light indicator. 2. Prepare the Remote: * Open the battery compartment on the programming remote and insert new batteries. 3. Enter Programming Mode: * Press and hold the Smart Button on the opener for 6 seconds until the LED light blinks rapidly. 4. Program the First Remote: * Press the button on the programming remote you want to use. * Hold the button down until the LED light on the opener stops blinking and remains lit. 5. Program Additional Remotes: * Repeat step 4 for each additional remote you want to program. * Allow a few seconds between programming each remote. 6. Exit Programming Mode: * Once all remotes are programmed, press and release the Smart Button again to exit programming mode. * The LED light will turn off. 7. Test Operation: * Press the button on the programming remote to check if the garage door opens and closes correctly.Advanced Features:
MyQ App Integration: * If your opener has MyQ technology, you can connect it to the MyQ app on your smartphone. * This allows you to remotely control your garage door, receive notifications, and view activity logs. Multiple Code Storage: * LiftMaster openers can store multiple remote codes, so you can have several people access your garage. Security+: * Security+ models offer enhanced security features, such as rolling code technology, which prevents unauthorized access.Troubleshooting:
* The remote isn't programming: Ensure that the batteries in the remote are fresh and that you're pressing the button firmly. * The garage door opens but doesn't close: Check the door's sensors to make sure they're aligned and unobstructed. * The LED light blinks continuously: The system may have lost power. Reset the opener by unplugging it for 30 seconds and plugging it back in.Conclusion:
* Programming a LiftMaster garage door opener is a simple and straightforward process that allows you to conveniently control your garage door remotely. * By following these instructions carefully, you can ensure a successful setup and enjoy the benefits of an automated garage door system.
How To Program A Liftmaster Garage Door Opener Remote

How To Program Travel On Liftmaster Security 2 0 Garage Door Opener

Program A Liftmaster Remote 890max 893max 895max Broten

How To Program A Garage Door Remote Change Battery Liftmaster Chamberlain

How To Program Liftmaster Remote Controls Doorvana Garage Doors

How To Program Your Liftmaster And Genie Garage Door Opener Remote Creative Services

Universal Garage Door Remote Liftmaster

How To Program A Liftmaster Garage Door Opener Remote

How To Erase And Program Liftmaster Garage Door Remote 604 757 6557

Programming Liftmaster 877max Wireless Keypad