How To Connect Garage Door Remote
Does your garage door opener only work by the push of a button that's located inside the garage? If that's the case, it's not as convenient as having a remote that you can use to open and close the garage door from the comfort of your car. Installing a garage door remote is not a difficult task, and it can be completed in a matter of minutes. Here are the steps on how to connect a garage door remote:
Step 1: Gather Your Materials
Before you begin, you'll need to gather a few materials. These include:
- A garage door remote
- A ladder
- A screwdriver
- A pair of pliers
Step 2: Locate the Garage Door Opener
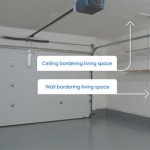
The first step is to locate the garage door opener. This will typically be located on the ceiling of the garage, near the door. Once you've found the opener, make sure that it is turned off. You may also need to unplug the opener from the outlet.
Step 3: Open the Garage Door Opener
Once the opener is turned off, you can open the cover. This will typically be held in place by a few screws. Once you've removed the screws, you can lift the cover off of the opener.
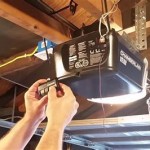
Step 4: Locate the Learn Button
Once you've opened the opener, you'll need to locate the learn button. This button will typically be located on the circuit board of the opener. It may be labeled with a small light or an icon of a remote control.
Step 5: Press the Learn Button
Once you've found the learn button, press and hold it down. The light on the button will typically begin to flash. This indicates that the opener is in learn mode.
Step 6: Press the Button on the Remote
While the light on the learn button is flashing, press and hold down the button on the remote. The light on the remote will typically begin to flash as well. This indicates that the remote is being programmed.
Step 7: Release the Buttons
Once the lights on both the learn button and the remote have stopped flashing, you can release the buttons. The remote is now programmed and should be able to open and close the garage door.
Step 8: Test the Remote
Once the remote is programmed, test it to make sure that it works. Press the button on the remote and see if the garage door opens. If the door does not open, repeat steps 4-7.
Step 9: Close the Garage Door Opener
Once the remote is working, close the cover of the garage door opener. Make sure that the screws are tightened securely.
Step 10: Plug the Garage Door Opener Back In
Plug the garage door opener back into the outlet and turn it on. The remote should now be able to open and close the garage door.

How To Connect Garage Door Opener Car Complete Guide

How To Program Garage Door Opener Remote Diy

How To Program A Garage Door Opener Your Car Easy Steps

How To Program A Remote For Chamberlain Liftmaster Craftsman Garage Door Opener Setup Process Youtube

How To Program A Garage Door Opener Your Car Easy Steps

Connecting The Garage Door Control Wire

How To Connect Your Car S Garage Door Remote

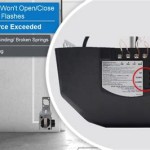
Garage Door Remote Not Working 5 Most Common Reasons Why

How To Program A Garage Door Opener Remote All Brands

Garage Door Help How To Program Your Remote Control
See Also