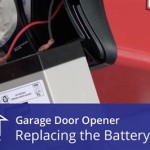
Garage Door Repair Cable Replacement
Garage doors are essential components of many homes and businesses, providing secure access to vehicles and storage areas. However, even the most well-maintained garage doors can experience issues over time, and one common problem is the need to replace the garage door cables.
Garage door cables play a crucial role in the operation of the door, helping to lift and lower it smoothly. When a cable snaps or becomes damaged, it can cause the door to become inoperable or even hazardous. In such situations, it is essential to replace the cables promptly to restore the functionality and safety of the garage door.
Signs of Garage Door Cable Issues
There are several signs that may indicate the need for garage door cable replacement. Some common symptoms include:
- A door that is difficult to lift or lower manually
- A door that opens or closes unevenly
- A door that makes unusual noises during operation
- A door that shakes or vibrates excessively
- Visible damage to the cables, such as fraying or rust
Steps for Replacing Garage Door Cables
Replacing garage door cables can be a challenging task, especially if you do not have experience with home repairs. However, with the right tools and a step-by-step guide, it is possible to complete the replacement safely and effectively.
- Safety First: Before starting any work on your garage door, disconnect the power supply to the door opener. This will prevent accidental activation of the door during the repair process.
- Gather Tools: You will need a few basic tools to replace the cables, including a socket wrench, pliers, and a ladder.
- Support the Door: Before removing the old cables, it is important to support the door to prevent it from falling. You can do this by placing a jack or a pair of sawhorses under the bottom of the door.
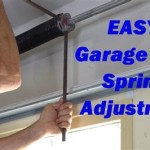
- Disconnect Springs: The garage door springs are under tension and must be disconnected before working on the cables. Follow the manufacturer's instructions for disconnecting the springs safely.
- Remove Old Cables: Once the springs are disconnected, you can remove the old cables. Start by unhooking them from the pulleys at the top of the door and then from the bottom brackets.
- Install New Cables: Take the new cables and hook them onto the pulleys at the top of the door. Then, thread the cables through the bottom brackets and secure them with the bolts provided.
- Tighten Cables: Use the socket wrench to tighten the bolts that secure the cables to the bottom brackets. Ensure that the cables are tight but not overtightened.
- Reconnect Springs: Once the cables are tightened, you can reconnect the garage door springs. Follow the manufacturer's instructions to reconnect the springs safely.
- Test the Door: With the cables replaced and the springs reconnected, you can test the door to ensure that it is operating smoothly. Lift and lower the door manually a few times to check for any issues.
Safety Precautions
When replacing garage door cables, it is crucial to prioritize safety. Always wear gloves and safety glasses during the repair process. If you are not comfortable working with springs or have any doubts about your ability to complete the replacement safely, it is advisable to seek professional assistance.

Comprehensive Guide To Repairing Broken Garage Door Cables

Broken Garage Door Cable Discount

Garage Door Cable Repair Fort Myers How To Fix A Broken Mr Top Doors

Garage Door Cable Repair Md Service Baltimore

Quality Garage Door Cable Replacement Safety Solutions

How To Align Garage Door Cable Torsion Diy Repair

Garage Door Cable Repair By Experts In Norristown Pa

Garage Door Cable And Fittings

Garage Door Cable Repair Services Doors For You

Garage Door Cable Repair Fix And Replace Cables
See Also