Garage Door Remote Keypad Programming: A Comprehensive Guide
Garage door remote keypads offer a convenient and secure method of accessing a garage without the need for a physical remote or key. These keypads typically mount on the exterior of the garage and allow entry via a user-defined PIN code. While the concept is straightforward, the process of programming these keypads can vary depending on the manufacturer and model. This article provides a detailed exploration of the common methods and considerations involved in programming garage door remote keypads.
The initial step in programming a garage door keypad involves identifying the make and model of the garage door opener. This information is typically found on a label affixed to the motor unit inside the garage. Knowing the brand is crucial because each manufacturer employs slightly different programming protocols. Chamberlain, LiftMaster, Craftsman (often rebranded Chamberlain products), Genie, and Stanley are some of the most common brands encountered. Once the brand is identified, consult the owner's manual for the specific keypad model. If the manual is unavailable, the manufacturer's website typically provides downloadable versions. The model number is usually located on the back of the keypad or on a sticker inside the battery compartment.
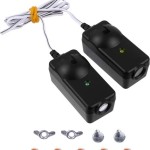
Understanding the components involved is essential for successful programming. The garage door opener motor unit contains a "learn" or "program" button. This button, when pressed, puts the opener into a learning mode, allowing it to recognize the signal from the keypad. The placement of this button varies; it's commonly found on the back or side of the motor unit. The remote keypad itself consists of a keypad with buttons for entering the PIN and a transmit button that sends the signal to the garage door opener. Some advanced models may feature LCD screens or backlighting. Batteries power the keypad, and weak batteries are a frequent cause of programming difficulties. Before attempting to program the keypad, ensure the batteries are fresh and properly installed.
Understanding the "Learn" Button and Security Features
The "learn" button is the key to linking the keypad with the garage door opener. When activated, the opener briefly enters a receptive state, awaiting a signal from a compatible device, such as the keypad. Security features have become increasingly sophisticated in garage door openers, particularly with the introduction of rolling code technology. Rolling code systems change the access code each time the remote is used, preventing unauthorized access by intercepting the signal. When programming rolling code keypads, the programming process typically involves pressing the "learn" button, entering the PIN code on the keypad, and then pressing the transmit button. The opener then learns the current rolling code generated by the keypad.
Older garage door openers may use a fixed code system. These keypads have a series of dip switches that must be matched to the dip switches on the garage door opener's receiver. Programming a fixed-code keypad involves opening the keypad and the garage door opener and manually adjusting the positions of the dip switches to match. While less secure than rolling code systems, fixed code keypads are still functional and can be programmed relatively easily as long as the dip switch positions are known.
Some garage door openers also feature a security lockout mode. This mode temporarily disables the remote controls and keypad, preventing operation of the garage door. This feature is often activated during periods of extended absence or to prevent unauthorized access. If the garage door opener is in security lockout mode, the keypad will not program correctly until the lockout mode is deactivated, typically by pressing and holding a specific button on the wall-mounted garage door opener control panel.
Common Programming Methods
The programming process for garage door keypads generally follows a similar pattern, but variations exist between brands and models. A typical programming sequence involves the following steps:
- Clear existing codes (if applicable): Some keypads retain previous codes, which may interfere with the programming process. To clear existing codes, press and hold the "*" and "#" buttons (or the "0" and "Program" buttons on some models) simultaneously until the keypad light stops flashing or a solid light appears.
- Press the "learn" button on the garage door opener motor unit. The indicator light near the button will illuminate, indicating that the opener is in learning mode. Act quickly as the learning mode typically lasts for a limited time, usually around 30 seconds.
- Within 30 seconds of pressing the "learn" button, enter the desired 4-digit PIN code on the keypad and press the transmit or "Enter" button. Some keypads require repeating this step two or three times.
- The garage door opener should now activate, indicating successful programming. If the door does not activate, repeat the process, ensuring the correct PIN code is entered and the transmit button is pressed firmly.
- Test the keypad by entering the PIN code and pressing the transmit button. The garage door should open or close. If the door does not respond, double-check the battery status of the keypad and repeat the programming steps.
For Genie Intellicode keypads, the programming process is slightly different. The "learn" button is typically located under the light lens cover on the motor unit. After pressing the "learn" button, the indicator light will flash. Enter the PIN code on the keypad and press the "SEND" button. The garage door opener should then activate. Repeat the process a second time to confirm the programming.
Older Stanley garage door openers use a different programming method altogether. These openers often have a series of numbered terminals. To program a Stanley keypad, disconnect the power to the garage door opener. Find the programming terminals on the motor unit. Connect the keypad to the appropriate terminals using jumper wires. Reconnect the power to the garage door opener. Enter the desired PIN code on the keypad and press the transmit button. Disconnect the jumper wires. The keypad should now be programmed.
In all cases, referring to the manufacturer's instructions is paramount for accurate programming. Deviations from the specified procedure can lead to unsuccessful programming and frustration.
Troubleshooting Common Programming Issues
Despite following the instructions carefully, programming problems can still arise. Some of the most common issues and their solutions include:
- Weak Batteries: As mentioned before, weak batteries are a frequent culprit. Replace the batteries with fresh ones before attempting to program the keypad.
- Distance Issues: The keypad needs to be within range of the garage door opener to transmit the signal effectively. Move closer to the garage door opener during the programming process.
- Interference: Radio frequency interference from other devices can disrupt the signal. Turn off nearby electronic devices that could be causing interference.
- Multiple Keypads: If multiple keypads are programmed to the same garage door opener, one keypad may interfere with the programming of another. Clear all existing codes from the garage door opener before programming a new keypad. This is usually done by pressing and holding the "learn" button for an extended period (usually 5-10 seconds) until the indicator light turns off.
- Incorrect PIN Code: Double-check the PIN code being entered. An incorrect PIN code will prevent successful programming.
- Faulty Keypad: In rare cases, the keypad itself may be faulty. If all other troubleshooting steps have been exhausted, consider replacing the keypad.
Another common problem arises from the "learn" button timing out. The garage door opener remains in learning mode for a limited time, usually around 30 seconds. If the PIN code is not entered and the transmit button is not pressed within this time frame, the learning mode will expire, and the programming will fail. Repeat the process, ensuring the PIN code is entered promptly after pressing the "learn" button. Furthermore, ensure that the "learn" button is fully depressed. Sometimes, a partial press will not activate the learning mode.
Understanding the type of security system employed by the garage door opener is also critical. Older fixed-code systems require matching dip switch settings, while newer rolling code systems use a learn button and require prompt code entry. Attempting to program a rolling code keypad using a fixed-code procedure, or vice versa, will not work.
Finally, consult online forums and video tutorials. Many online resources provide specific instructions and troubleshooting tips for various garage door opener and keypad models. These resources can offer valuable insights and alternative programming methods that may not be explicitly mentioned in the owner's manual. Manufacturer's customer support lines can also provide guidance if the problem persists.
Successfully programming a garage door remote keypad improves convenience and home security. By understanding the different types of keypads, programming methods, and troubleshooting techniques, homeowners can effectively manage access to their garages without the need for a physical key or remote.

How To Program Your Garage Door Keypad Sterling Llc

Wireless Keypad Programming Instructions By Overhead Door

How To Easily Reset Garage Door Keypad

Programming Liftmaster 877max Wireless Keypad

How To Program A Chamberlain Wireless Keypad

How To Program A Universal Garage Door Opener Keypad

How To Reprogram Liftmaster Garage Door Remotes And Keypads Tech

How To Program Keypad For Chamberlain Liftmaster Craftsman Garage Door Opener Keyless Entry Pin

How To Change Or Program A Garage Door Keypad

How To Program A Liftmaster Garage Door Opener Remote