Do It Yourself Garage Insulation
Garage insulation is a great way to make your garage more comfortable and energy-efficient. It can help to keep your car warm in the winter and cool in the summer, and it can also reduce your energy bills. If you're handy, you can install garage insulation yourself in a few hours.
The first step is to choose the right type of insulation. There are a few different types of insulation that are suitable for garages, including fiberglass, cellulose, and spray foam. Fiberglass is the most common type of insulation, and it's relatively inexpensive. Cellulose is made from recycled paper, and it's a good choice for people who are looking for an environmentally friendly option. Spray foam is the most expensive type of insulation, but it's also the most effective.
Once you've chosen the type of insulation you want, you'll need to gather the necessary materials. You'll need insulation, a utility knife, a measuring tape, a level, a stapler, and a ladder. You may also need to purchase a vapor barrier, which is a material that helps to prevent moisture from entering the insulation.
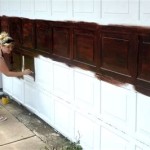
The next step is to prepare the garage for insulation. You'll need to remove any furniture or other objects from the garage, and you'll need to clean the walls and ceiling. If there are any cracks or holes in the walls or ceiling, you'll need to seal them with caulk or weatherstripping.
Once the garage is prepared, you can start installing the insulation. If you're using fiberglass insulation, you'll need to cut the insulation to fit the walls and ceiling. You can use a utility knife to cut the insulation, and you'll need to wear gloves and a dust mask to protect yourself from the fiberglass fibers.
Once the insulation is cut to size, you can start stapling it to the walls and ceiling. You'll need to space the staples about 12 inches apart, and you'll need to make sure that the insulation is tight against the walls and ceiling.
If you're using cellulose insulation, you'll need to blow it into the walls and ceiling using a blower machine. You can rent a blower machine from a home improvement store, and you'll need to wear a dust mask to protect yourself from the cellulose fibers.
If you're using spray foam insulation, you'll need to apply it to the walls and ceiling using a spray gun. You can rent a spray gun from a home improvement store, and you'll need to wear a respirator to protect yourself from the fumes.
Once the insulation is installed, you'll need to install a vapor barrier. The vapor barrier will help to prevent moisture from entering the insulation and causing it to become moldy or mildew.
To install the vapor barrier, you'll need to cut the vapor barrier to fit the walls and ceiling. You can use a utility knife to cut the vapor barrier, and you'll need to wear gloves and a dust mask to protect yourself from the fibers.
Once the vapor barrier is cut to size, you can start stapling it to the walls and ceiling. You'll need to space the staples about 12 inches apart, and you'll need to make sure that the vapor barrier is tight against the walls and ceiling.
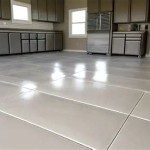
Once the vapor barrier is installed, your garage is insulated. You can now enjoy a more comfortable and energy-efficient garage.

The Easiest Most Effective Diy Garage Door Insulation

Diy Garage Door Insulation Kits A1 Affordable Services

How To Insulate A Garage Hgtv

How To Insulate Your Garage In 6 Steps Dumpsters Com

How To Insulate Garage Doors The Home

Diy Insulation Kits Applications Insulfoam

Garage Door Insulation Diy Radiant Barrier Youtube

Installing Reach Barrier Garage Door Insulation Kit

We Tested The Best Garage Door Insulation Kits See Our Favorite

6 Best Garage Door Insulation Kits For Temperature Control