Chamberlain Garage Door Openers Installation
Chamberlain garage door openers are a popular choice for homeowners because of their reliability, durability, and ease of installation. If you're looking to install a Chamberlain garage door opener yourself, here's a step-by-step guide to help you through the process:
Step 1: Gather Your Tools and Materials
Before you begin, make sure you have all the necessary tools and materials. You'll need:
- Chamberlain garage door opener
- Screwdriver
- Drill
- Wrench
- Safety glasses
- Work gloves
Step 2: Prepare the Door
Start by preparing the garage door for the installation. Make sure the door is clean and free of any debris. Then, disconnect the power to the garage door opener and remove the old opener (if there is one).
Step 3: Install the Mounting Brackets
Next, you need to install the mounting brackets for the garage door opener. The brackets should be mounted on the ceiling, directly above the garage door. Use the screws provided with the opener to secure the brackets.
Step 4: Attach the Rail
Once the mounting brackets are installed, you can attach the rail to the brackets. The rail should be positioned so that it is parallel to the garage door and about 12 inches above the door.
Step 5: Install the Trolley
The trolley is the part of the garage door opener that moves the door up and down. Attach the trolley to the rail and then connect the opener's chain or belt to the trolley.
Step 6: Wire the Opener
Now it's time to wire the garage door opener. Connect the opener's wires to the appropriate terminals on the motor unit. Be sure to follow the instructions provided with the opener.
Step 7: Connect the Safety Sensors
Safety sensors are required by law in most areas. These sensors prevent the garage door from closing if there is something in its path. Install the sensors on either side of the garage door, about 6 inches above the ground.
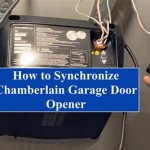
Step 8: Program the Remote
Once the opener is installed and wired, you need to program the remote control. Follow the instructions provided with the opener to program the remote.
Step 9: Test the Opener
Before you use the garage door opener, test it to make sure it's working properly. Open and close the door several times and check for any problems.
Step 10: Maintenance
To keep your Chamberlain garage door opener running smoothly, perform regular maintenance. This includes lubricating the chain or belt, checking the safety sensors, and inspecting the electrical connections.

How To Assemble And Install A Chamberlain Belt Drive Garage Door Opener

Install Chamberlain Garage Door Opener On 8 Ft

Chamberlain Wi Fi Garage Door Opener Installation Highlights

How To Install A Garage Door Opener Chamberlain B2405 With Myq Youtube

Chamberlain Chain Drive Garage Door Opener Overview Install Youtube

How To Assemble And Install A Chamberlain Wi Fi Garage Door Opener

How To Assemble Install A Chamberlain Wi Fi Garage Door Opener

Wall Mount Garage Door Opener Install Chamberlain Rjo70

Chamberlain Security Bundle Garage Door Opener Installation

Garage Door Opener Installation Local Expert You