Replacement Battery for LiftMaster Garage Door Opener
If your LiftMaster garage door opener is exhibiting signs of a failing battery, it's essential to replace it promptly to ensure the smooth operation of your door. A worn-out battery can result in slow or jerky movement, intermittent operation, or complete failure of the opener. Replacing the battery is a relatively simple and inexpensive task that can be performed by most homeowners with basic tools.
Identifying the Battery Type
Before purchasing a replacement battery, it's crucial to identify the correct type used in your LiftMaster garage door opener model. Different models may require different battery sizes and types. Refer to your opener's user manual or contact LiftMaster's customer service for specific information about the compatible battery type.
Choosing the Right Battery
Once you have identified the appropriate battery type, consider the following factors when making a choice:
- Capacity: Measured in amp-hours (Ah), the capacity indicates how long the battery will power the opener before requiring a recharge.
- Voltage: Ensure the battery's voltage matches the requirements specified in your opener's manual.
- Brand: Opt for reputable brands that offer high-quality batteries with reliable performance and long life.
Replacing the Battery
Follow these steps to replace the battery in your LiftMaster garage door opener:
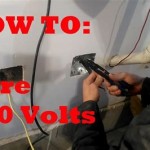
- Safety first: Before starting any work, ensure the power to the opener is disconnected at the circuit breaker.
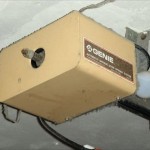
- Locate the battery: Most LiftMaster openers have the battery installed in a compartment near the motor assembly.
- Disconnect the terminals: Using a screwdriver or spanner, carefully disconnect the battery terminals. Note the polarity of the connections to ensure correct installation of the new battery.
- Remove the old battery: Gently lift the battery out of its compartment and dispose of it properly.
- Install the new battery: Insert the new battery into the compartment, ensuring the terminals are correctly aligned.
- Reconnect the terminals: Tighten the terminals firmly to secure the battery in place.
- Reconnect power: Restore power to the opener at the circuit breaker.
- Test the opener: Activate the opener and observe its operation to ensure everything is functioning correctly.
Battery Maintenance Tips
To extend the life of your LiftMaster garage door opener battery, follow these simple maintenance tips:
- Avoid extreme temperatures: Keep the opener away from direct sunlight and extreme heat or cold, as these conditions can shorten battery life.
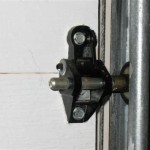
- Lubricate moving parts: The gears and chain of your opener should be lubricated periodically to reduce friction and wear, which can strain the battery.
- Use the opener regularly: Regular operation helps keep the battery charged and prevents it from discharging completely.

485lm Garage Door Opener Battery Backup Liftmaster

041b0591 Battery Backup Kit Parts Liftmaster

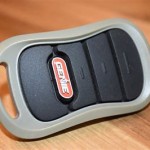
How To Replace Garage Door Opener Remote Battery Change Replacement Liftmaster Clicker Batteries

Replace Your Garage Opener Remote Battery Easy Diy

K010a0020 3v Battery Discontinued Parts Liftmaster

Lift Master Elite Series 8550 Battery

Liftmaster 485lm Integrated Bbu Replacement Battery

How To Change The Battery On Garage Door Remote Liftmaster Security Chamberlain Opener

How To Change The Battery On A Garage Door Opener Remote Liftmaster Youtube

Liftmaster Garage Door Opener Remote Battery Diy Tips 2024