Linear Garage Door Openers Programming
Linear garage door openers are some of the most popular on the market, and for good reason. They're well-made, reliable, and easy to use. However, one of the most challenging aspects of installing a Linear garage door opener is programming the remote controls. Here's a step-by-step guide to programming Linear garage door openers:
Step 1: Gather your materials.
You will need the following items:
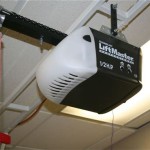
*Step 2: Locate the program button.
The program button is usually located on the back or side of the garage door opener. It will be a small, black button with a lightning bolt symbol on it.
Step 3: Press and hold the program button.
The LED light on the garage door opener will begin to flash. This indicates that the opener is in programming mode.
Step 4: Press the button on the remote control.
The LED light on the garage door opener will stop flashing and stay lit. This indicates that the remote control has been programmed.
Step 5: Repeat steps 3-4 for each additional remote control.
You can program up to four remote controls to a single garage door opener.
Step 6: Test the remote controls.
Once you have programmed all of the remote controls, test them to make sure they are working properly.
Troubleshooting:
If you are having trouble programming your Linear garage door opener, there are a few things you can try:
*
How To Program Universal Garage Door Remote With Overhead Opener Diy Video

Liftmaster Garage Door Remote Program Instructions New

Smart Garage Door Opener For Gds 630 Li Range Ismartgate

How To Program A Garage Door Remote Control Keypad And Homelink Ohd Kansas City

Step By Guide Programming Liftmaster Garage Door Opener

How To Program A Garage Door Remote Control Keypad And Homelink Ohd Kansas City

How To Reset Garage Door Opener Liftmaster Updated 2024

Smart Garage Door Opener For Older Models Ismartgate

Full 2024 Guide How To Program Genie Garage Door Opener

Program Your Garage Remote Control In 7 Steps
See Also