Essential Aspects of Programming a Garage Door Remote
Garage door remotes provide convenient access to your home, allowing you to open and close your garage door from afar. Programming them is a relatively straightforward process that can be completed in a few simple steps. Here's a comprehensive guide to help you program your garage door remote efficiently:
Materials Required:
- Garage door remote
- Garage door opener motor unit
- Ladder (optional)
Step-by-Step Programming Guide:
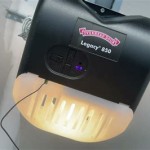
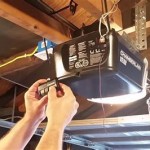
1. Locate the Learn Button:
The Learn button is usually located on the front or back of the garage door opener motor unit. It's typically labeled "Learn" or has a small light indicator. This button allows you to enter programming mode.
2. Clear Existing Codes (Optional):
If you're replacing an existing remote, it's advisable to clear the old codes first. This ensures that only the new remote will have access to the garage door. To clear codes, press and hold the Learn button for 5-10 seconds until the indicator light starts blinking rapidly.
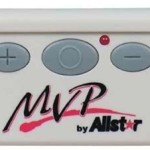
3. Put the Remote in Programming Mode:
Check the specific instructions for your remote model to enter programming mode. Some remotes require pressing a button on the side, while others involve holding a specific combination of buttons.
4. Press the Learn Button:
Once the remote is in programming mode, press and hold the Learn button on the garage door opener motor unit. The indicator light should start blinking.
5. Press the Remote Button:
While holding the Learn button, press the button on the remote that you want to program. Hold the button until the indicator light stops blinking and remains solid.
6. Repeat for Additional Remotes (Optional):
If you have multiple remotes to program, repeat steps 3-5 for each remote. Remember to enter the remote into programming mode before pressing the Learn button.
7. Test the Remote:
Once programmed, test the remote by pressing the button. The garage door should open or close, depending on the command sent.
Troubleshooting Tips:
- Ensure the batteries in the remote are fresh. Weak batteries can interfere with programming.
- Check if the garage door opener is receiving power. Inspect the power cord and make sure it's properly plugged in.
- Try reprogramming the remote. If the first attempt fails, repeat the steps carefully.
- Contact the manufacturer. If you encounter persistent issues, consult the garage door opener or remote manufacturer for further guidance.
Conclusion:
Programming a garage door remote is a simple task that can enhance convenience and security. By following the steps outlined above, you can effortlessly program your remote and gain seamless access to your garage. Remember to replace the battery periodically to ensure optimal performance.

How To Program A Garage Door Remote Change Battery Liftmaster Chamberlain Youtube

How To Program A Remote For Chamberlain Liftmaster Craftsman Garage Door Opener Setup Process Youtube

How To Program A Garage Door Opener Your Car Easy Steps

How To Program A Universal Garage Door Opener Remote Youtube

How To Program A Garage Door Opener Your Car Easy Steps

Reprogram Hand Held Garage Door Remote Control Adams

How To Program A Liftmaster Garage Door Opener Remote

How To Program Garage Door Opener Remote Diy Youtube

Program A Liftmaster Remote 890max 893max 895max Broten

How To Program A Garage Door Opener Your Car Easy Steps
See Also