Garage Door Rubber Seal Replacement
Garage door rubber seals are crucial components that ensure the smooth operation and energy efficiency of your garage door. They create a tight seal between the door and the frame, preventing water, dust, and air from entering. Over time, these seals can become worn or damaged, leading to various issues such as drafts, moisture problems, and increased energy bills.
Replacing garage door rubber seals is a relatively simple and inexpensive DIY project that can be completed in a few hours. By following the steps outlined below, you can effectively replace the worn seals and restore the optimal performance of your garage door.
Materials Required:
- New garage door rubber seal (compatible with your door model)
- Pry bar or flathead screwdriver
- Hammer or rubber mallet
- Scissors
- Measuring tape or ruler
- Clean rags
Step-by-Step Instructions:
- Safety First: Before starting any work, ensure your garage door is disconnected from the power source. Disengage the automatic opener if necessary.
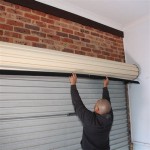
- Remove Old Seal: Using a pry bar or flathead screwdriver, carefully pry the old rubber seal loose from the garage door frame and track. Remove the old seal in one continuous piece.
- Measure and Cut New Seal: Measure the length of the top, bottom, and sides of the garage door frame and track. Cut the new rubber seal to the required lengths using scissors.
- Clean Surfaces: Wipe down the garage door frame and track with a clean rag to remove any dirt or debris. This will help ensure a good seal.
- Install Top and Bottom Seals: Starting with the top seal, align it with the top edge of the door frame and press it firmly into place. Use a hammer or rubber mallet to gently tap the seal into the groove. Repeat this process for the bottom seal.
- Install Side Seals: Align the side seals with the edges of the door frame and track. Press them into place, starting from the top and working your way down. Ensure the seals are securely seated in the grooves.
- Trim Excess Seal: If any excess rubber seal protrudes, carefully trim it flush using scissors.
- Re-engage Power: Once the new rubber seals are installed, reconnect the garage door to the power source and re-engage the automatic opener if necessary.
By following these steps, you can effectively replace the garage door rubber seals and restore the proper functioning of your garage door. Regular maintenance can help extend the lifespan of your garage door and ensure its optimal performance for years to come.

How To Replace Your Damaged Garage Door Bottom Seal Not As Easy You Think The Diy Truth

How To Replace Weather Stripping On A Garage Door

How To Replace Garage Door Bottom Seal Youtube

Garage Door Weather Seal Replacement Services A1 Service

How To Replace Garage Door Weather Stripping

Never Replace Garage Door Bottom Seal Until Watching This Fast Easy

How To Replace Garage Door Seals Automated Systems

Tiktok Shop Garage Door Seal Strip Black 34 4ft Rubber Weather Stripping Replacement Soft And Hard Composite

Double Garage Door Bottom Weatherseal Replacement By Frost King At Fleet Farm

How To Replace Your Damaged Garage Door Bottom Seal Not As Easy You Think The Diy Truth Youtube