How To Set Genie Garage Door Opener
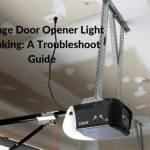
Garage door openers are an essential convenience in any modern home. They provide a safe and effortless way to open and close your garage door, even from the comfort of your car. Choosing the right garage door opener is important, but equally important is the proper installation and setup. In this article, we’ll provide detailed instructions on how to set up your Genie garage door opener.
Before you begin, it is important to consult your garage door opener manual. The specific steps may vary depending on the model you have. However, the general steps outlined in this article will apply to most Genie garage door openers.
Step 1: Gather Your Tools and Materials
To set up your Genie garage door opener, you will need the following tools and materials:
- Genie garage door opener
- Phillips head screwdriver
- 8-foot ladder
- Gloves
- Safety glasses
Step 2: Safety First
Before you begin any work on your garage door opener, be sure to follow these safety precautions:
- Disconnect the power to the garage door opener from the electrical panel.
- Wear gloves and safety glasses.
- Use a sturdy ladder to reach the ceiling of your garage.
Step 3: Install the Mounting Brackets
The first step is to install the mounting brackets on the ceiling of your garage. These brackets will support the garage door opener and its components.
- Locate the center of your garage door header.
- Hold the mounting bracket against the header and mark the screw holes.
- Drill pilot holes for the screws.
- Install the mounting brackets using the provided screws.
Step 4: Attach the Garage Door Opener
Once the mounting brackets are installed, you can attach the garage door opener.
- Lift the garage door opener onto the mounting brackets.
- Secure the garage door opener to the brackets using the provided bolts.
Step 5: Connect the Wiring
The next step is to connect the wiring to the garage door opener.
- Locate the wiring terminals on the garage door opener.
- Connect the black wire to the terminal marked “+”.
- Connect the white wire to the terminal marked “-”.
- Connect the green or bare copper wire to the terminal marked “GND”.
- Connect the yellow wire to the terminal marked "door control".
Step 6: Install the Door Sensor
The door sensor is a safety feature that prevents the garage door from closing if there is an object in its path.
- Position the door sensor on the edge of the garage door, about 6 inches from the ground.
- Secure the door sensor using the provided screws.
- Connect the door sensor wires to the terminals on the garage door opener marked “DOOR SENSOR”.
Step 7: Program the Remote Control
The final step is to program the remote control for your garage door opener.
- Press and hold the “learn” button on the garage door opener.
- Press the button on the remote control that you want to program.
- The garage door opener will flash its lights to indicate that the remote control is programmed.
Your Genie garage door opener is now set up and ready to use. Be sure to test the operation of the garage door opener before using it regularly.

Genie Remote Control Programming Full Video

How To Program A Genie Remote Your Garage Door Opener

How To Reset A Genie Garage Door Opener 7 Steps With S

How To Program A Garage Door Opener Remote All Brands

Programming Homelink To Newer Genie Openers

How To Set The Up And Down Limits On A Genie Garage Door Opener

Programming Setting Genie Garage Opener Limit

How To Program Genie Garage Door Opener Intellig 1000 Model 3024 Youtube

How To Reset A Genie Garage Door Opener 7 Steps With S

How To Set The Up And Down Limits On A Genie Garage Door Opener Youtube