How To Set A Liftmaster Garage Door Opener
LiftMaster garage door openers are a popular choice for homeowners due to their reliability and advanced features. However, setting up a new LiftMaster garage door opener can seem daunting if you're unfamiliar with the process. This article will guide you through the steps involved in setting up your LiftMaster garage door opener, ensuring a smooth and successful installation.
1. Gather Necessary Tools and Materials
Before you begin, it's crucial to have all the necessary tools and materials readily available. This will make the process much smoother and prevent unnecessary delays. Here's a list of essential items:
- LiftMaster garage door opener: Ensure you have the correct model and all the components.
- Owner's manual: This provides detailed instructions specific to your model.
- Phillips screwdriver: For attaching the opener unit and other components.
- Ladder: To reach the ceiling for installation.
- Safety glasses and gloves: For protection during installation.
- Wire cutters: For stripping wires if necessary.
- Wire connectors: For connecting the wiring to the opener.
- Voltage tester: To verify power supply and wiring.
- Tape measure: For measuring distances for installation.
- Level: For ensuring the opener unit is installed correctly.
- Optional: Drill and bits: For mounting the opener unit and the wall control.
Having these tools and materials on hand will ensure a successful and efficient setup process.
2. Prepare the Installation Area
Before beginning the installation, it's essential to prepare the area where the opener will be mounted. This involves ensuring a safe and clear workspace, and understanding the existing electrical wiring.
Start by disconnecting the power supply to the garage door. Locate the circuit breaker that controls the garage door outlet and switch it off. This will prevent electrical hazards during installation. Next, clear the area beneath the ceiling where the opener will be mounted, ensuring no obstacles are in the way. If you're replacing an existing opener, remove it carefully, noting the wiring connections to aid in the new installation.
Now, it's time to assess the existing electrical wiring. Determine if you need to extend the existing wires or run a new line. Check the wiring for any damage or wear and tear. If necessary, replace any faulty wiring before installing the new opener.
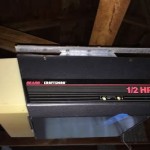
3. Attach the Opener Unit
With the installation area prepared, you can start mounting the opener unit to the ceiling. Consult your owner's manual for detailed instructions on how to mount the opener for your specific model. Typically, you will place the opener unit on the ceiling above the garage door track.
Use the provided mounting bracket to secure the unit. Ensure that the opener is level and securely attached to the ceiling. If your opener requires a specific distance from the door track, use a tape measure to ensure proper positioning. After attaching the opener unit, you can then proceed to attaching the rail to the opener and the door track.
Remember to check the opener’s position periodically as you attach the rails to ensure the opener stays level. Once the rail is securely attached, it’s time to connect the door to the opener unit using the provided trolley assembly. This allows the opener to move the garage door up and down.
4. Connect the Wiring
Connecting the wiring is a crucial step that requires care and accuracy. Refer to your owner's manual for specific wiring diagrams and instructions. Use the voltage tester to verify the power supply and ensure the wiring is correctly connected before turning on the power.
Connect the wires from the opener unit to the power source and the safety sensors. The opener unit will typically have a separate connector for the sensors. Be sure to connect the wires according to the colors and labels on the opener unit and the power source. Once all wires are connected, double-check for secure connections.
It is critical to test the wiring connections periodically to ensure they are secure. Once you are satisfied with the wiring connections, carefully restore the power supply by turning back on the breaker for the outlet.
5. Program the Remote Controls
With the opener unit wired and powered, you can program the remote controls. Instructions for programming remote controls are provided in the owner's manual. Typically, the process involves holding down the "learn" button on the opener unit while pressing a button on the remote control.
LiftMaster garage door openers often come with multiple programming options, allowing you to program different remotes and keypads. The manual outlines the specific steps for setting up these functions. Once the remotes are programmed, test them by opening and closing the garage door. The garage door should respond to the remote control commands.
6. Test and Adjust the Opener
With the opener installed, wired, and programmed, it's time to test its operation. Open and close the garage door several times to ensure it operates smoothly and without any issues. Pay attention to the travel of the door, listen for any unusual noises, and confirm that the safety sensors are working correctly.
The safety sensors are crucial for preventing the door from closing on someone or something in its path. Test them by placing an object in the path of the sensors. The door should stop and reverse its direction if the sensors detect an obstruction.
If necessary, you can adjust the opener's settings for things like door travel, force, and speed. Consult your owner's manual for instructions on how to adjust these settings. These adjustments will ensure that the opener functions properly and safely.
Setting up a LiftMaster garage door opener involves several steps, but following these instructions will help you complete the installation process smoothly. Take your time and double-check all connections and the wiring before restoring power. Once the opener is properly installed and programmed, enjoy the convenience and security it provides for your garage.

How To Program Travel On Liftmaster Security 2 0 Garage Door Opener

Learn Button On A Liftmaster Garage Door Opener Doorvana Doors

How To Program A Garage Door Remote Change Battery Liftmaster Chamberlain

How To Program A Liftmaster Garage Door Opener Remote

Liftmaster Owner S Manual Model 81 315lm

Liftmaster Garage Door Opener Programming To Car In Panama City Fl

Program A Liftmaster Remote 890max 893max 895max Broten

Programming Liftmaster 877max Wireless Keypad

How To Easily Program Your Liftmaster Garage Door Opener

How To Program Your Liftmaster And Genie Garage Door Opener Remote Creative Services