How To Change The Code On A Chamberlain Garage Door Opener
The security of a home often relies on the integrity of its garage door opener system. Chamberlain is a prominent manufacturer of garage door openers, known for its diverse range of models and advanced security features. A crucial aspect of maintaining this security is knowing how to change the code on the garage door opener, ensuring that only authorized individuals can access the property. This article provides a comprehensive guide on how to change the code on a Chamberlain garage door opener, covering various models and scenarios.
The necessity of periodically changing the garage door opener code cannot be overstated. Circumstances such as moving into a new home, losing a remote, or suspecting unauthorized access warrant immediate code modification. Failure to do so can leave the homeowner vulnerable to security breaches and potential property loss. Understanding the procedures for code modification is, therefore, an integral part of responsible homeownership.
Understanding Chamberlain Garage Door Opener Security Technologies
Chamberlain utilizes various security technologies, the most common being rolling code technology, also known as Security+. This system generates a new security code each time the remote or wall control is used. This rolling code technology significantly reduces the risk of code theft, as the transmitted code is never the same twice. This feature is a cornerstone of modern garage door opener security, preventing replay attacks where a captured signal is used to gain unauthorized access.
Older Chamberlain models might employ fixed-code technology, where the code remains constant unless manually changed. While less secure than rolling code systems, fixed-code systems still offer a level of protection if the code is not publicly known. These systems typically involve DIP switches that can be configured to a unique combination, offering a level of customization. However, the limited number of possible combinations makes them more susceptible to brute-force attacks compared to rolling code systems.
Furthermore, Chamberlain integrates with MyQ technology in many of its newer openers. MyQ enables remote control of the garage door via a smartphone app, adding another layer of convenience and security. Changing the code in a MyQ-enabled system often involves updating the settings within the app as well as on the garage door opener unit itself. Failure to synchronize the app and the opener can create access inconsistencies and potentially compromise security.
Step-by-Step Guide to Changing Rolling Codes (Security+ Systems)
The process of changing the code on a Chamberlain garage door opener with rolling code technology generally involves putting the opener into "learn" mode and then programming the remotes and keypads to the new code. This process is designed to be relatively straightforward, ensuring that homeowners can easily update their security settings.
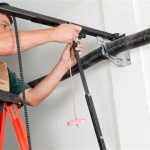
Step 1: Accessing the Learn Button The first step is to locate the "learn" button on the garage door opener motor unit. This button is typically located on the back or side of the unit, often near the antenna wire. The button is usually brightly colored, often yellow, orange, red, or purple, and is labeled "learn," "program," or a similar term. The color of the learn button often indicates the type of rolling code technology used. Yellow buttons typically signify Security+ 2.0, while orange or red buttons indicate older Security+ systems. Consult the garage door opener's manual for the specific location and function of the learn button for the model in question.
Step 2: Entering Learn Mode Once the learn button is located, press it briefly. A small LED light near the button will usually illuminate, indicating that the opener is now in learn mode. The duration of this mode is typically limited to 30 seconds, so preparations to program the remotes and keypads should be made in advance.
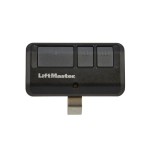
Step 3: Programming Remotes Immediately after pressing the learn button, press and hold the button on the remote control that is to be programmed. Continue holding the button until the garage door opener light flashes or the garage door moves slightly. This indicates that the remote control has been successfully programmed to the new rolling code. It may be necessary to repeat this step two or three times for some models.
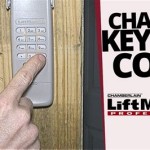
Step 4: Programming Keypads If a keypad is used, the programming process is similar. After pressing the learn button on the motor unit, enter the desired PIN on the keypad and then press the "enter" button. The garage door opener light should flash or the door should move to indicate successful programming. Some keypads may require entering a temporary password before programming the personalized PIN.
Step 5: Testing the System After programming all remotes and keypads, test each device to ensure that it properly operates the garage door. If a device fails to operate the door, repeat the programming steps for that specific device. Ensuring that each device is functioning correctly is crucial for maintaining consistent access and security.
Step 6: Erasing Existing Codes (Optional) To erase all previously programmed codes, press and hold the learn button on the motor unit for approximately six seconds, or until the learn indicator light turns off. This action will clear the memory of all remotes and keypads, requiring them to be reprogrammed using the steps outlined above. This step is particularly important when moving into a new home or suspecting that a remote has been lost or stolen.
Changing Fixed Codes (DIP Switch Systems)
For older Chamberlain models employing fixed-code technology, changing the code involves physically manipulating the DIP switches located on both the garage door opener motor unit and the remote controls. DIP switches are small switches that can be toggled between two or three positions, typically labeled "on," "off," and sometimes "neutral." The unique combination of these switch positions defines the code for the system.
Step 1: Locating the DIP Switches The DIP switches are usually located on the back of the remote control and on the garage door opener motor unit. The remote control may require opening the battery compartment to access the switches. The motor unit's switches are usually accessible after removing the light cover or a small access panel.
Step 2: Setting the New Code Using a small screwdriver or pen, change the position of the DIP switches on both the remote control and the motor unit. It is crucial that the switch positions on the remote and the motor unit match exactly. Otherwise, the remote will not be able to activate the garage door opener. Record the new switch positions for future reference, in case a replacement remote needs to be programmed.
Step 3: Testing the System After setting the new code, test the remote control to ensure that it properly operates the garage door. If the door does not respond, double-check the switch positions on both the remote and the motor unit, ensuring that they are identical. It is important to test the remote from various distances to ensure reliable operation.
Managing Codes in MyQ-Enabled Chamberlain Openers
Chamberlain's MyQ technology allows users to control their garage door openers remotely via a smartphone app. Modifying access codes in a MyQ-enabled system requires changes both within the MyQ app and on the garage door opener unit itself.
Step 1: Removing Existing Users Within the MyQ app, navigate to the user management section. Here, it is possible to remove existing users who should no longer have access to the garage door. This step is crucial for ensuring that only authorized individuals can control the garage door remotely.
Step 2: Adding New Users To grant access to new users, invite them through the MyQ app. The new users will receive an email or notification prompting them to create an account and link their device to the garage door opener. Ensure that the new users understand the importance of maintaining the security of their MyQ account.
Step 3: Updating Passwords Regularly update the password associated with the MyQ account. Choosing a strong, unique password can prevent unauthorized access to the system. Avoid using easily guessable passwords or reusing passwords from other online services.
Step 4: Reprogramming Remotes and Keypads Even with MyQ integration, physical remotes and keypads still need to be programmed directly to the garage door opener unit, following the steps outlined for rolling code or fixed-code systems, depending on the model. This ensures that access is restricted even if the MyQ system is temporarily unavailable.
Step 5: Monitoring Activity The MyQ app provides a history of garage door activity, including when the door was opened and closed. Regularly reviewing this activity can help identify any unauthorized access attempts. If suspicious activity is detected, immediately change the MyQ password and reprogram all remotes and keypads.
By following these procedures, homeowners can effectively change the code on their Chamberlain garage door opener, ensuring the security of their property and safeguarding against unauthorized access. Regular code changes, coupled with proper maintenance of the opener system, contribute to a secure and reliable garage door operation.

How To Program A Chamberlain Wireless Keypad

How To Reset Your Chamberlain Keyless Entry Keypad Pass Code Step By Procedure

How To Change An Existing Code On The Chamberlain Garage Door Opener Keypad

How To Add Program Or Change A Keyless Entry Pin

How To Change Your Pin Code On A Chamberlain Liftmaster Or Craftsman Garage Door Opener Password

How To Reset Your Garage Door Keypad Pin Number

Programming Liftmaster And Chamberlain Keypads Champion Garage Door Repair

How To Change Your Keypad Pin Code On A Liftmaster Garage Door

Programming A Chamberlain Garage Door Opener Easy Steps

How To Change Liftmaster Keypad Code Garage Door Doctor Tutorial