1/25 Scale Garage Dioramas: A Detailed Guide
The creation of 1/25 scale garage dioramas represents a fascinating intersection of model building, historical accuracy, and artistic expression. These miniature environments capture the essence of automotive culture, offering a glimpse into the workshops and garages where vehicles are maintained, restored, or simply stored. The 1/25 scale, a popular choice among automotive modelers, provides a balance between detail and manageable size, allowing for intricate recreations without demanding excessive space. Understanding the nuances of building a compelling and realistic 1/25 scale garage diorama requires careful planning, attention to detail, and a willingness to embrace the creative process.
The appeal of garage dioramas extends beyond mere replication. They serve as miniature time capsules, reflecting specific eras, automotive styles, and personal narratives. A diorama depicting a 1950s service station, for instance, would feature different equipment, signage, and vehicle types compared to a modern performance shop. The selection of tools, accessories, and even the condition of the building contribute to the overall story and authenticity of the scene. Furthermore, the diorama allows the modeler to showcase their skills in weathering, painting, and scratch building, transforming simple materials into convincing representations of real-world objects.
Selecting the Right Scale and Subject Matter
The 1/25 scale, while widely popular, is not the only option for garage dioramas. Other common scales include 1/18, 1/24, and 1/43. The choice of scale depends on personal preference, available space, and the desired level of detail. 1/25 scale is often favored for its compatibility with numerous commercially available model kits and accessories. This makes it easier to source vehicles, figures, and tools to populate the diorama. The scale also allows for a reasonable level of detail without becoming overwhelmingly complex to build.
Choosing the subject matter for the diorama is a crucial step. Consider the historical period, the type of garage (e.g., home garage, professional restoration shop, race team garage), and the specific activities taking place. A diorama depicting a vintage hot rod garage, for example, would require different elements than one showcasing a modern performance tuning shop. Researching the chosen subject thoroughly is essential for ensuring accuracy in the details. This includes studying photographs, blueprints, and historical accounts to understand the layout, equipment, and overall atmosphere of the scene.
The narrative of the diorama is equally important. What story do you want to tell? Is the mechanic working on a challenging repair? Is a classic car undergoing a complete restoration? Is it simply a space where a prized vehicle is stored and maintained? The narrative will guide the selection of figures, tools, and accessories, and it will influence the overall composition of the diorama. A well-defined narrative helps to create a sense of realism and engagement, drawing the viewer into the scene.
Construction Techniques and Material Selection
Building a 1/25 scale garage diorama involves a range of construction techniques and material selection. The base of the diorama typically consists of a sturdy material such as plywood, MDF (medium-density fiberboard), or foam board. The walls can be constructed using similar materials or, for a more realistic appearance, using textured styrene sheets or embossed cardstock. These materials can be easily cut, shaped, and glued to create the basic structure of the garage.
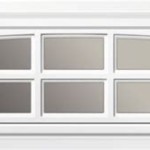
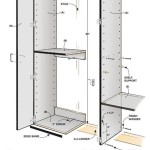
Detailing the walls is essential for creating a convincing environment. This can involve adding elements such as windows, doors, electrical outlets, and shelving. Windows can be created using clear acetate or styrene sheets, while doors can be scratch-built or sourced from commercial model kits. Electrical outlets can be represented using small plastic shapes or decals. Shelving can be constructed from thin strips of wood or styrene, and populated with miniature tools, parts, and accessories.
The floor of the garage is another important element to consider. Options include using textured styrene sheets to simulate concrete, tile, or other flooring materials. Alternatively, the floor can be painted and weathered to create a realistic appearance. Adding details such as cracks, stains, and oil spills can further enhance the realism of the scene. The roof, often overlooked, can be constructed using similar materials as the walls and detailed with shingles, roofing panels, or other appropriate elements.
Material selection plays a crucial role in the overall appearance of the diorama. Styrene plastic is a versatile material for scratch building, as it can be easily cut, shaped, and glued. Wood can be used for structural elements and detailing, providing a realistic texture and appearance. Cardstock and paper can be used for signage, posters, and other printed materials. Weathering powders, washes, and paints are essential for creating realistic finishes and adding depth and character to the diorama.
Adding Details and Finishing Touches
The success of a 1/25 scale garage diorama often lies in the details. Adding realistic tools, equipment, and accessories can significantly enhance the authenticity of the scene. Miniature toolboxes, jacks, workbenches, and air compressors can be sourced from commercial model kits or scratch-built using various materials. Automotive parts, such as tires, engines, and transmissions, can be obtained from spare model kits or purchased separately. These elements can be arranged to create a sense of activity and purpose within the garage.
Figures are another important element to consider. Adding miniature figures of mechanics, drivers, or even bystanders can bring the diorama to life and add a sense of scale. Figures can be purchased pre-painted or painted to match the specific narrative of the scene. Posing the figures realistically is crucial for creating a convincing environment. Consider the actions they are performing and the context of the scene when positioning them.
Lighting can also play a significant role in the overall impact of the diorama. Adding miniature LED lights can illuminate the scene, highlighting specific details and creating a more realistic atmosphere. Lights can be positioned under workbenches, above toolboxes, or inside vehicles to create a sense of depth and realism. The appropriate type of lighting (e.g., warm white, cool white) should be chosen to match the era and style of the garage.
Weathering is an essential technique for creating a realistic and believable diorama. This involves adding details such as rust, dirt, oil stains, and other signs of wear and tear. Weathering powders, washes, and drybrushing techniques can be used to create these effects. The key is to apply weathering subtly and realistically, avoiding excessive or unnatural-looking effects. The level of weathering should be appropriate for the specific context of the diorama. A pristine showroom garage would require minimal weathering, while a heavily used restoration shop would require more extensive weathering.
Finally, the presentation of the diorama is important. Consider displaying the diorama in a suitable enclosure, such as a clear acrylic case or a custom-built wooden frame. This will protect the diorama from dust and damage, while also enhancing its visual appeal. Adding a descriptive plaque or label can provide context and information about the diorama, further engaging the viewer.
Lighting Techniques and Effects
Incorporating lighting into a 1/25 scale garage diorama elevates its realism and visual impact significantly. Effective lighting not only illuminates the scene but also creates depth, highlights key details, and sets the mood. The choice of lighting techniques and effects should align with the specific era and function of the garage being depicted.
LEDs (Light Emitting Diodes) are the preferred choice for diorama lighting due to their small size, low power consumption, and long lifespan. They are available in a variety of colors, brightness levels, and form factors, allowing for a wide range of lighting effects. Micro LEDs, specifically designed for model building, are ideal for illuminating small spaces and creating subtle highlights.
Several lighting techniques can be employed to enhance the diorama: Ambient lighting provides an overall illumination of the scene. This can be achieved by placing LEDs above the garage, simulating overhead fluorescent lights or incandescent bulbs. Task lighting focuses on specific areas, such as workbenches or engine bays. This can be achieved by using miniature spotlights or strip lights. Accent lighting highlights specific details, such as tools, equipment, or vehicle parts. This can be achieved by using pinpoint LEDs or fiber optic cables. Backlighting can be used to create silhouettes or to illuminate signage. This can be achieved by placing LEDs behind translucent surfaces.
Creating realistic lighting effects requires careful planning and execution. Consider the color temperature of the LEDs. Warm white LEDs simulate incandescent lighting, while cool white LEDs simulate fluorescent lighting. Blend different color temperatures to create a more natural and realistic effect. Use dimmers to control the brightness of the LEDs. This allows for fine-tuning the overall lighting level and creating different moods. Add shadows to create depth and realism. This can be achieved by strategically positioning lights and objects within the diorama. Consider the scale of the lighting fixtures. Use miniature light fixtures that are appropriately sized for the 1/25 scale. Hide the wiring for the LEDs. This can be achieved by routing the wires behind walls, under floors, or inside objects. Consider using a battery pack or a power adapter to power the LEDs. Choose a power source that is appropriate for the number of LEDs and the desired runtime.
By carefully incorporating lighting into a 1/25 scale garage diorama, modelers can create a more immersive and visually appealing scene.

New Finished Custom Made Model Showroom Garage 1 24 25 Diorama

2 Model Choices 1 24 25 Scale Showroom Garage Rear Service Center Complete Models Unfinished Add Your Own Touch Or Finished Etsy

1 25 Scale Repair Garage Diorama Fits Carrera Scalextric Eldon Lionel More Ebay

Building A Garage Diorama With Chevy S 10 1 25 Scale Model Pickup

Ipmsusa 27 Jpg Mw 1000 Mh 800

Various Models 1 24 25 Scale Garages Gas Stations Showrooms Fronts Unfinished Add Your Own Wall Etc Etsy

1 25 Scale Backyard Diorama

1 24 25 Scale 4 Post 3 Model Car Lift For Garage Diorama Or Show Case Ebay

Garage Diorama 1 25 Model Kit By Marc Antoine

Garage Diorama Accessory Set Construction Zone 1 24 18425 Wholesale Toys And Diecast Model Cars